This post may contain affiliate links. Please read our disclosure policy.
Hello there! If you are looking for a fun baking project for both kids and adults alike, this is it! These cute cookies are TASTY!!!! and so fun to make. I decorated the first few and then let my kids loose to do the rest. They had a great time! Hope you give them a try.
We are entering the baking season everyone!
Heaven help us.
COOKIES
1. Mix all cookie ingredients (except the food coloring!) in a stand mixer, or with a wooden spoon until nicely combined.
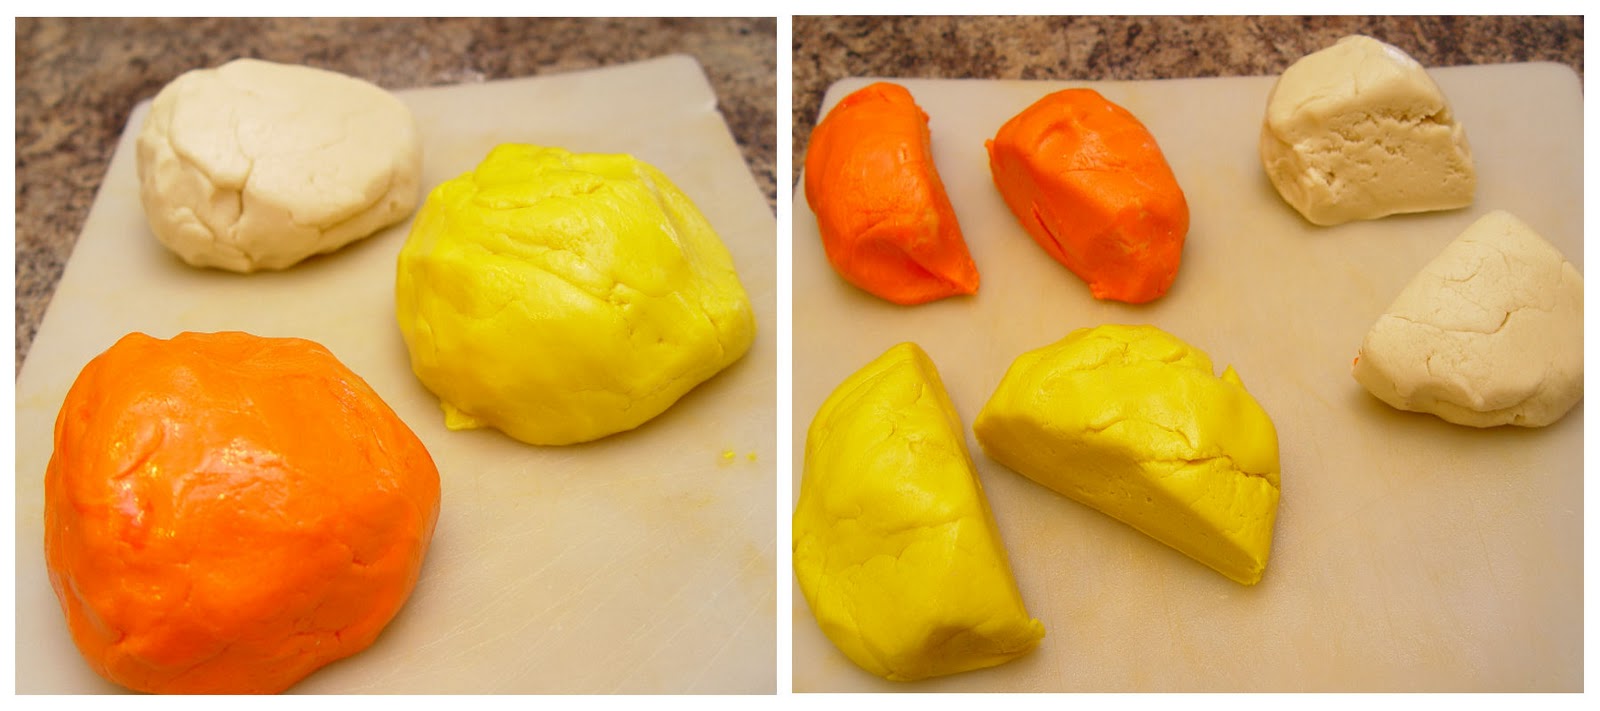
2. Split the dough into thirds. Add the yellow food coloring to one section and the orange to another. Split each color into two sections.

2. With a rolling pin roll each section (you should have 6 now, 2 of each color) into a rectangle. Mine were about 9 inches long…..

…..and 4 inches wide. Now, you don’t need to be this exact. The most important thing is that all of the sections are rolled out to be about the same size. Don’t worry about it being perfect. Perfect is EXTREMELY overrated and not very fun, actually.
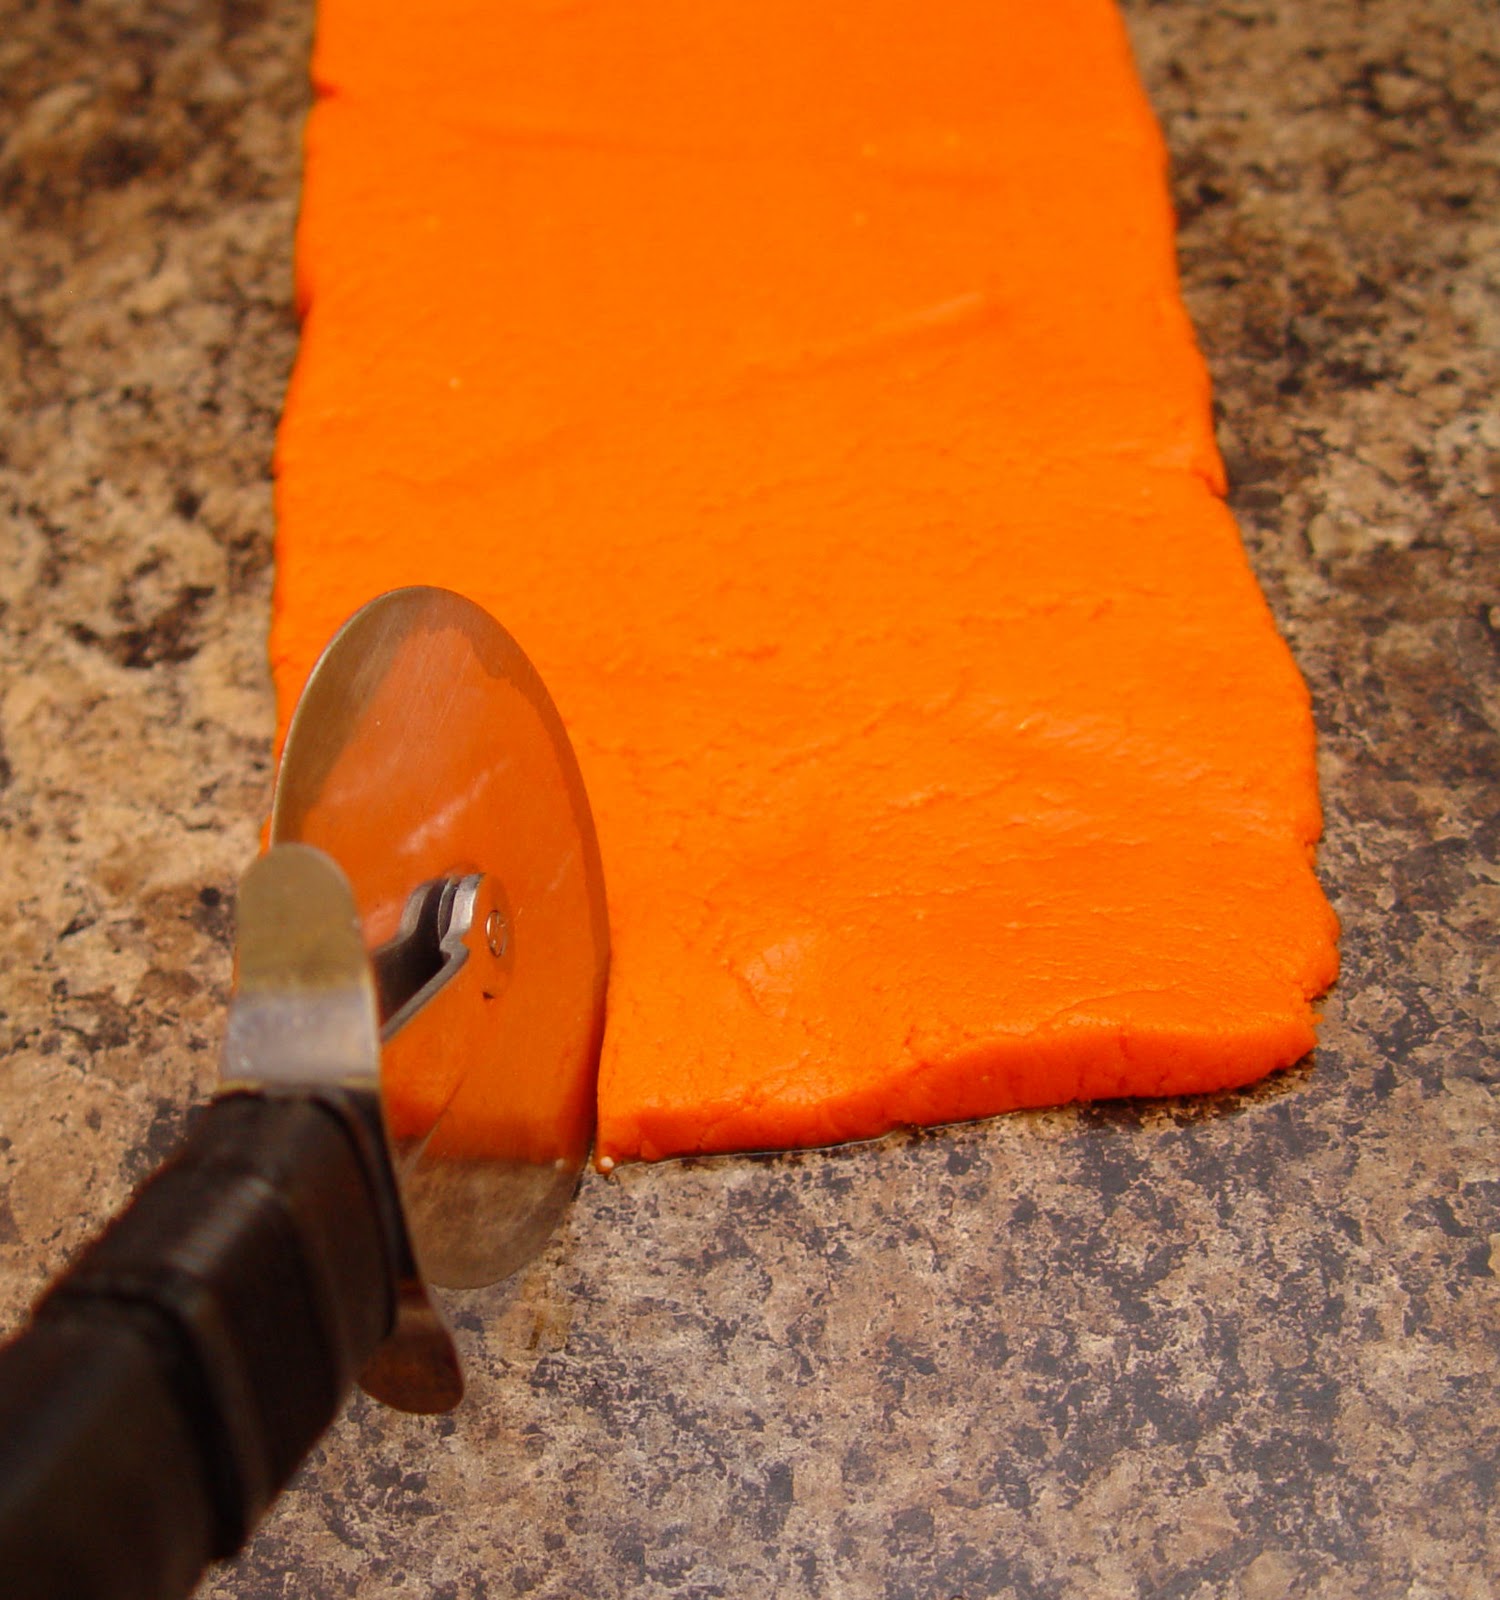
3. Take a pizza cutter and cut each triangle into thirds.
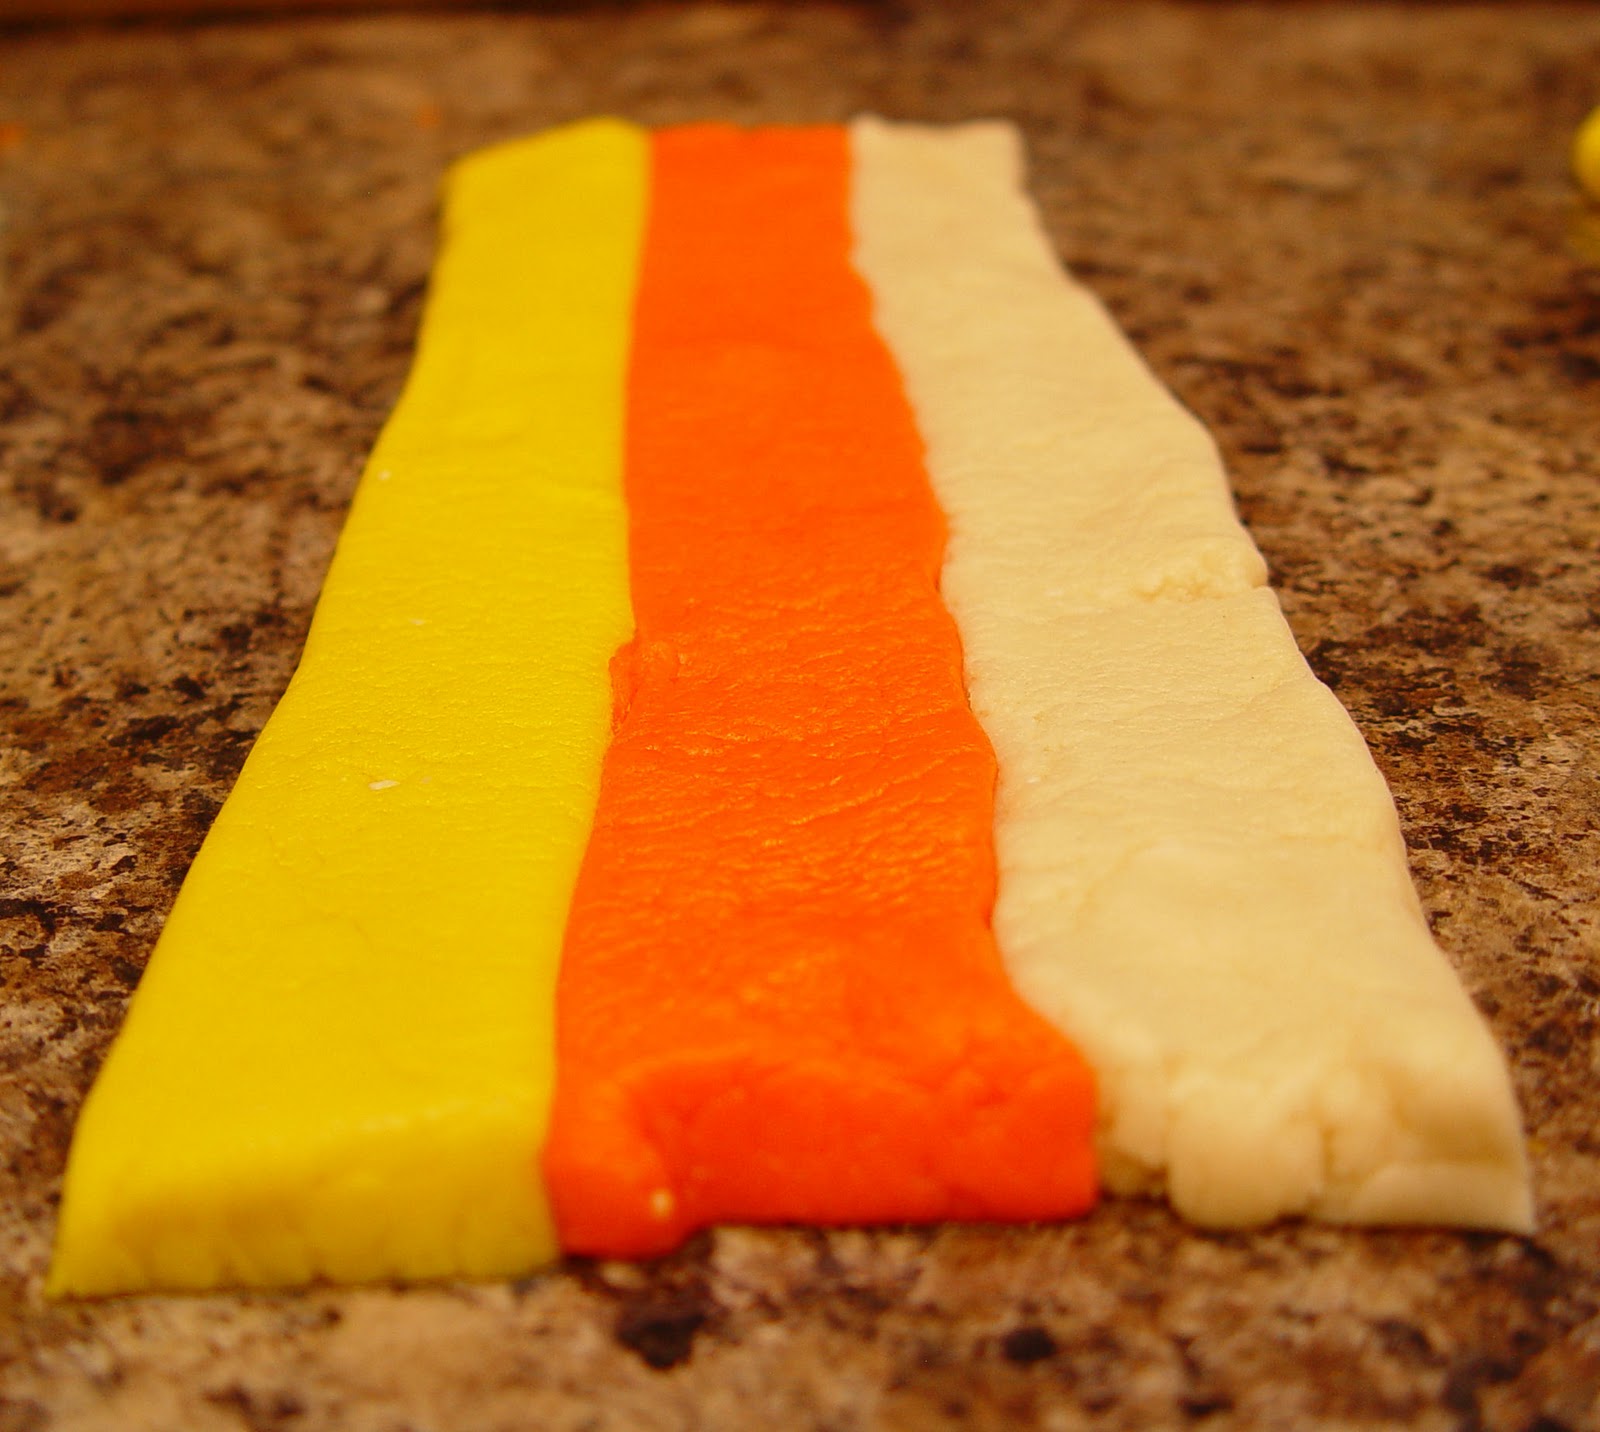
4. Gently place a yellow, orange and white strip of dough together. Press the seams down a bit with your fingers so they begin to stick. Again with the “they don’t need to be perfect.” If the strips break a bit while you are moving them around, don’t sweat it! Just press them back together and all will be well.

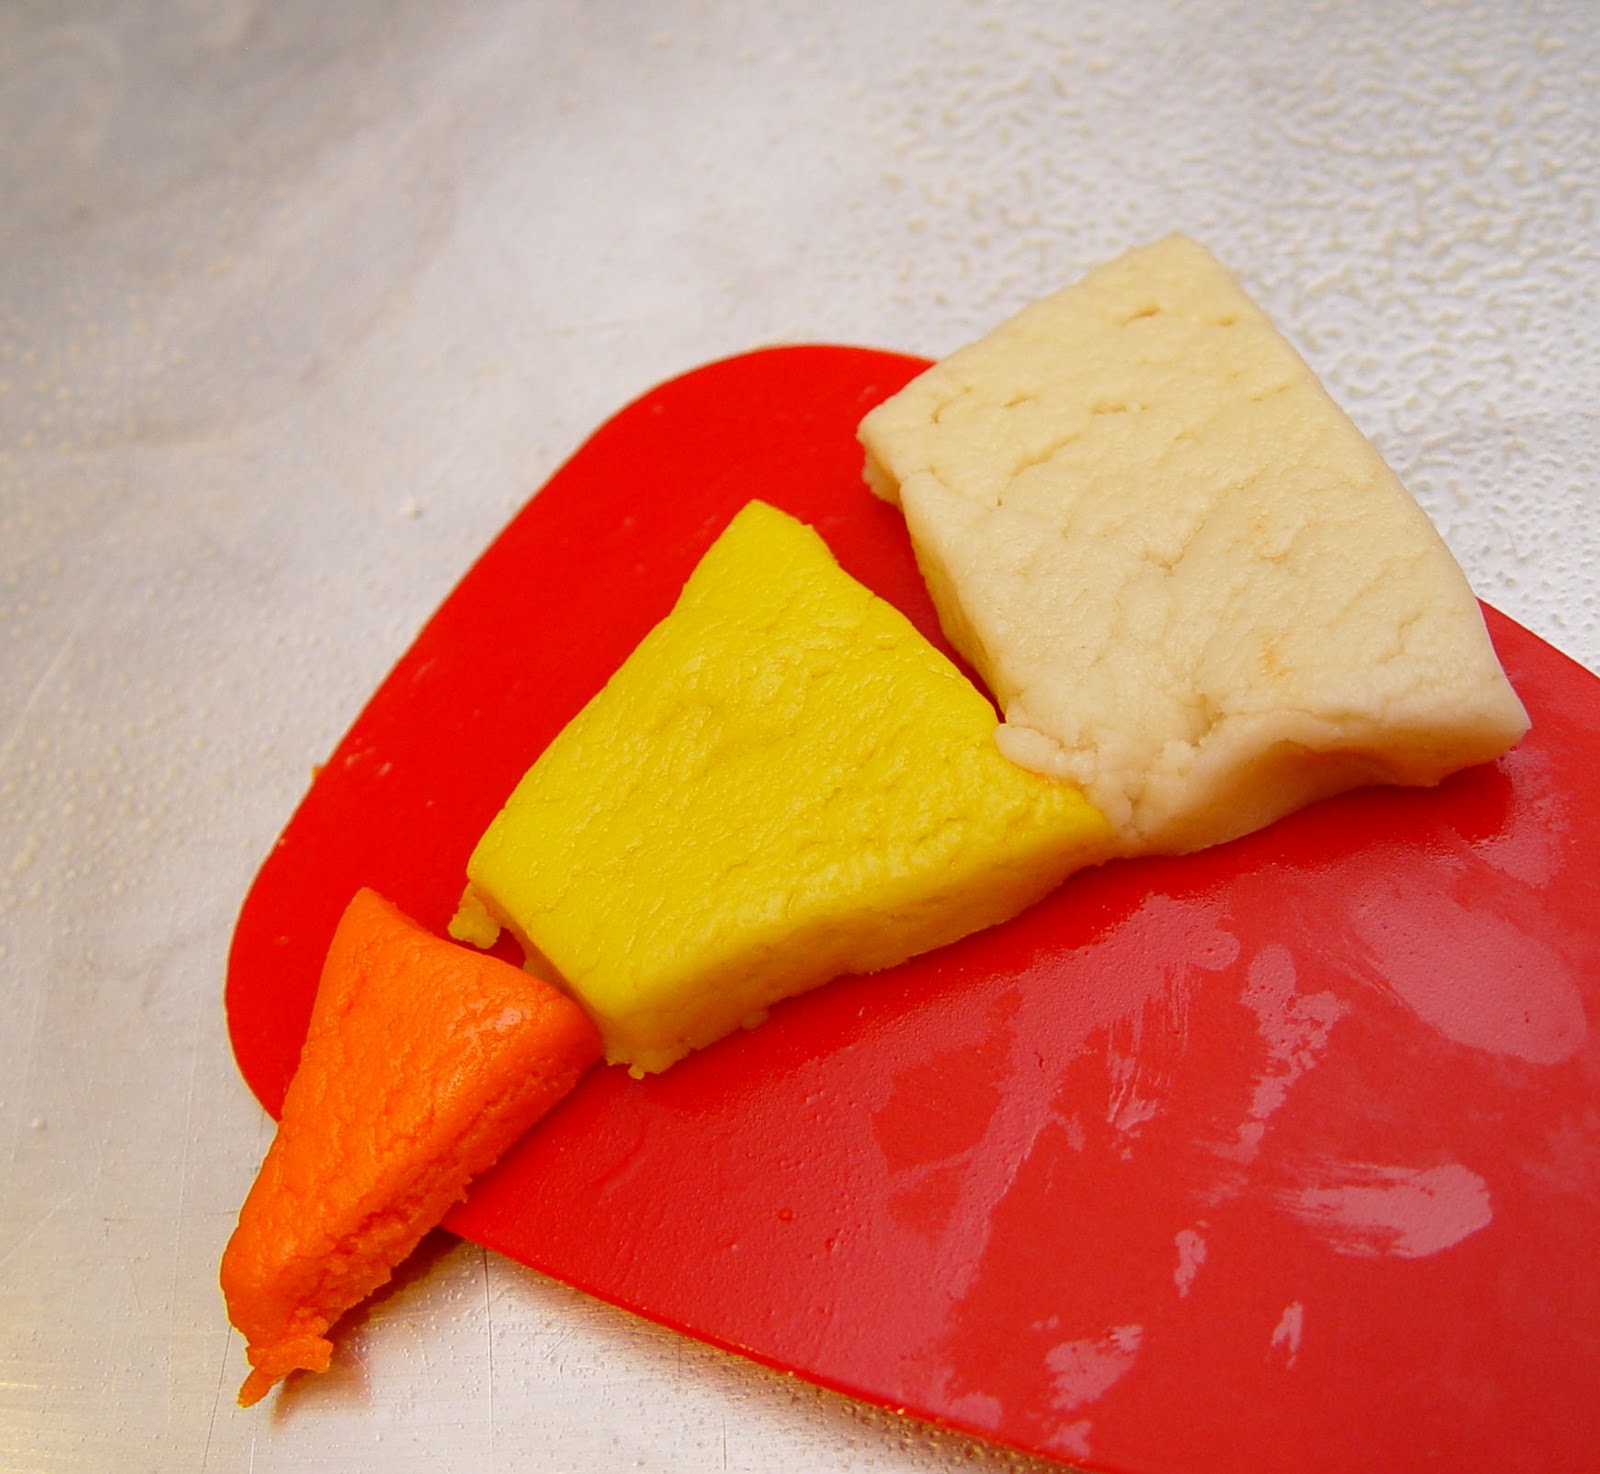
5. Take a sharp knife and cut the strips into triangles.

You can see here that there are two little triangles left at each end. I actually ended up rolling these into balls and baking them as round cookies. You could do that, or just eat the dough. Or just bake some small triangles. What ever suits your fancy.
6. Gently place each cookie on a cookie sheet. I used a spatula, slipping it under each triangle to help assist it to the sheet. Some of them came a part just a bit, but no worries! Just press the seams back together on the sheet. The baking really helps to fuse them together.
7. Bake at 350 for 8 minutes. (For Convection Ovens bake at 325 for 6 1/2 minutes.) Let them cool completely on a wire rack before frosting.
FROSTING
1. In a stand mixer, or with hand held beaters mix all frosting ingredients excepting the food coloring. Beat it well! You want it to have a bit of a whipped feel to it.
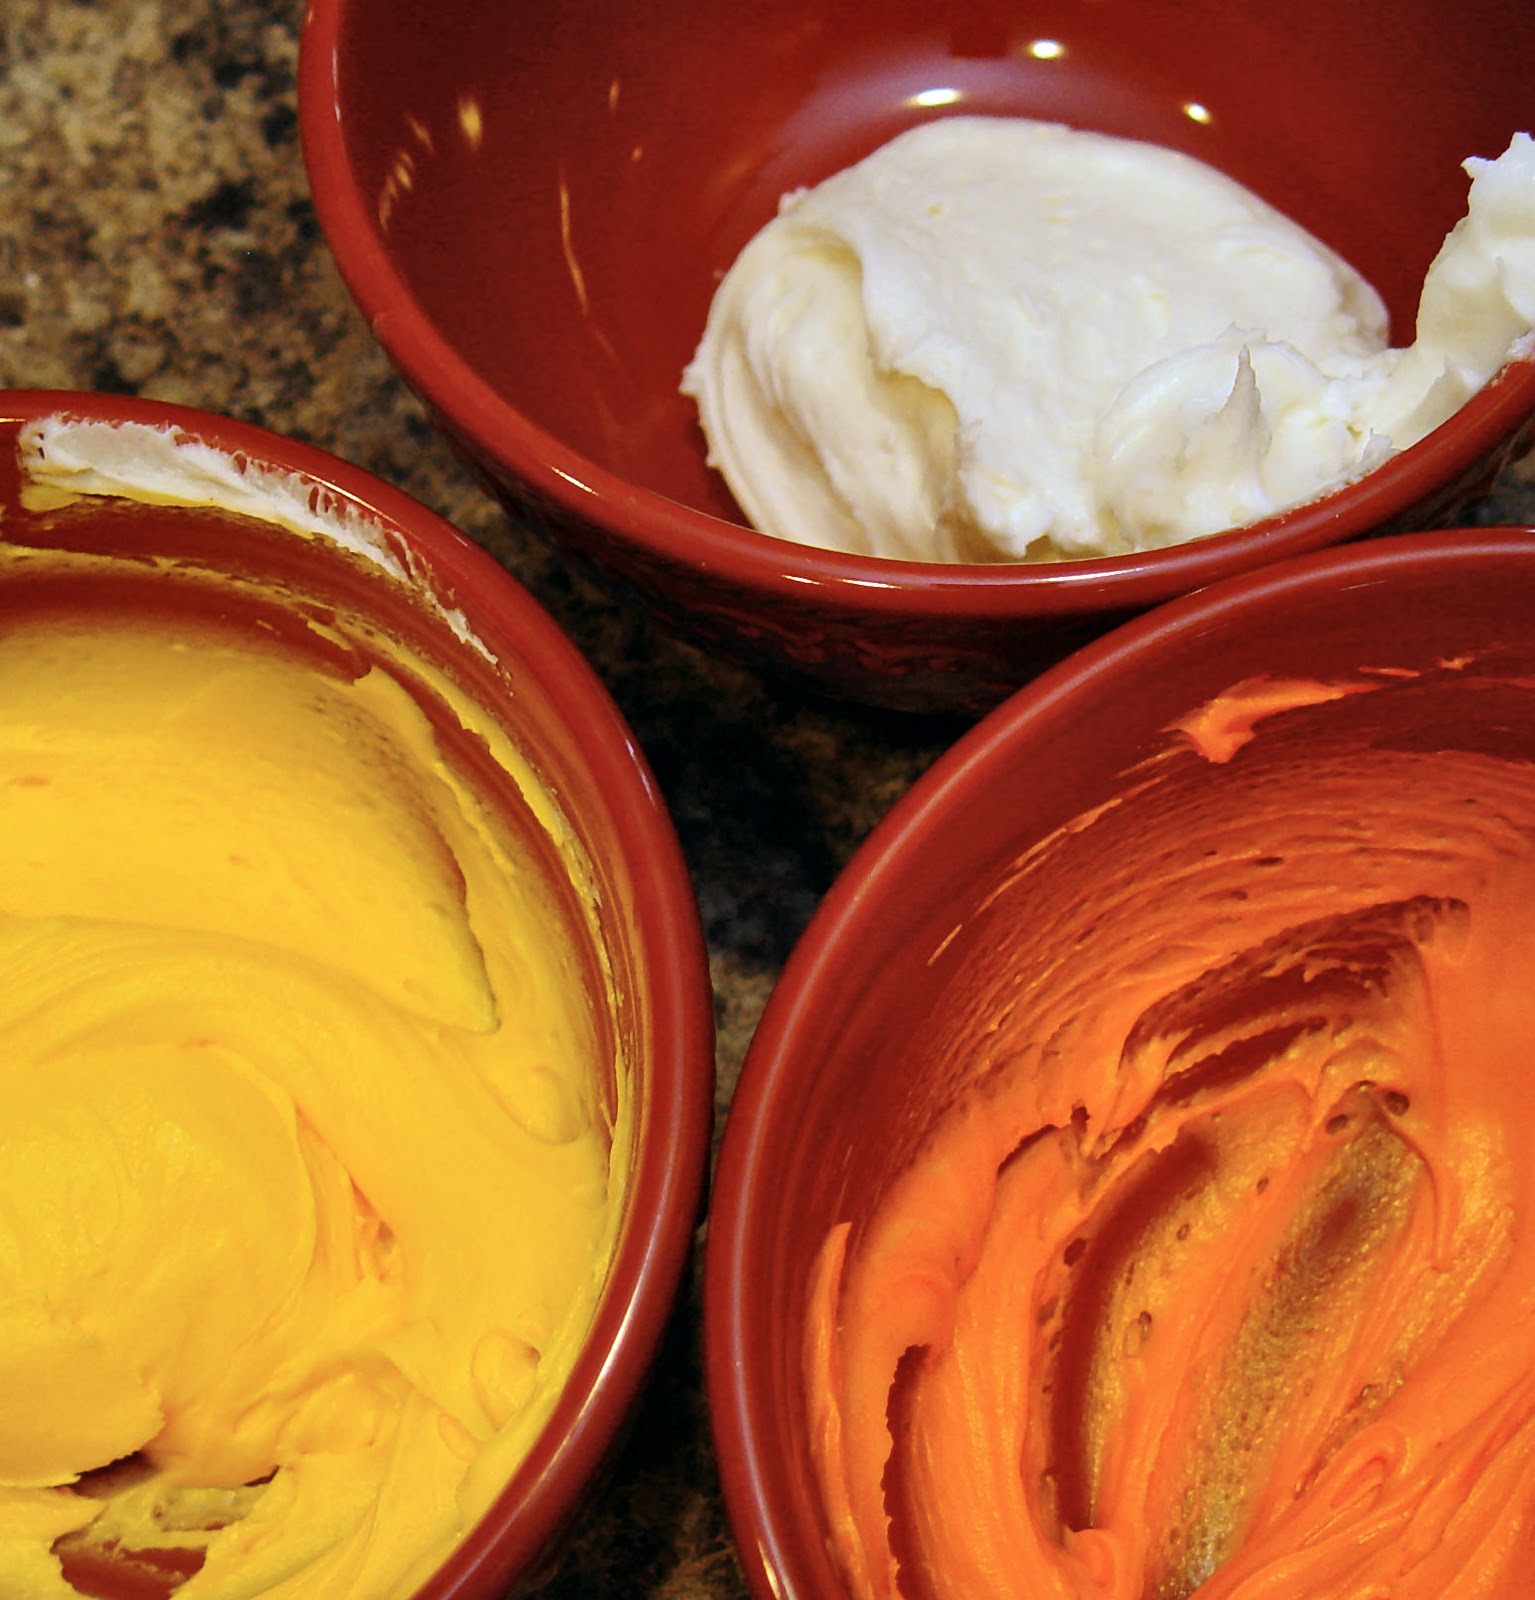
2. Divide the frosting into thirds and place in separate bowls. Color the frosting with the food coloring.
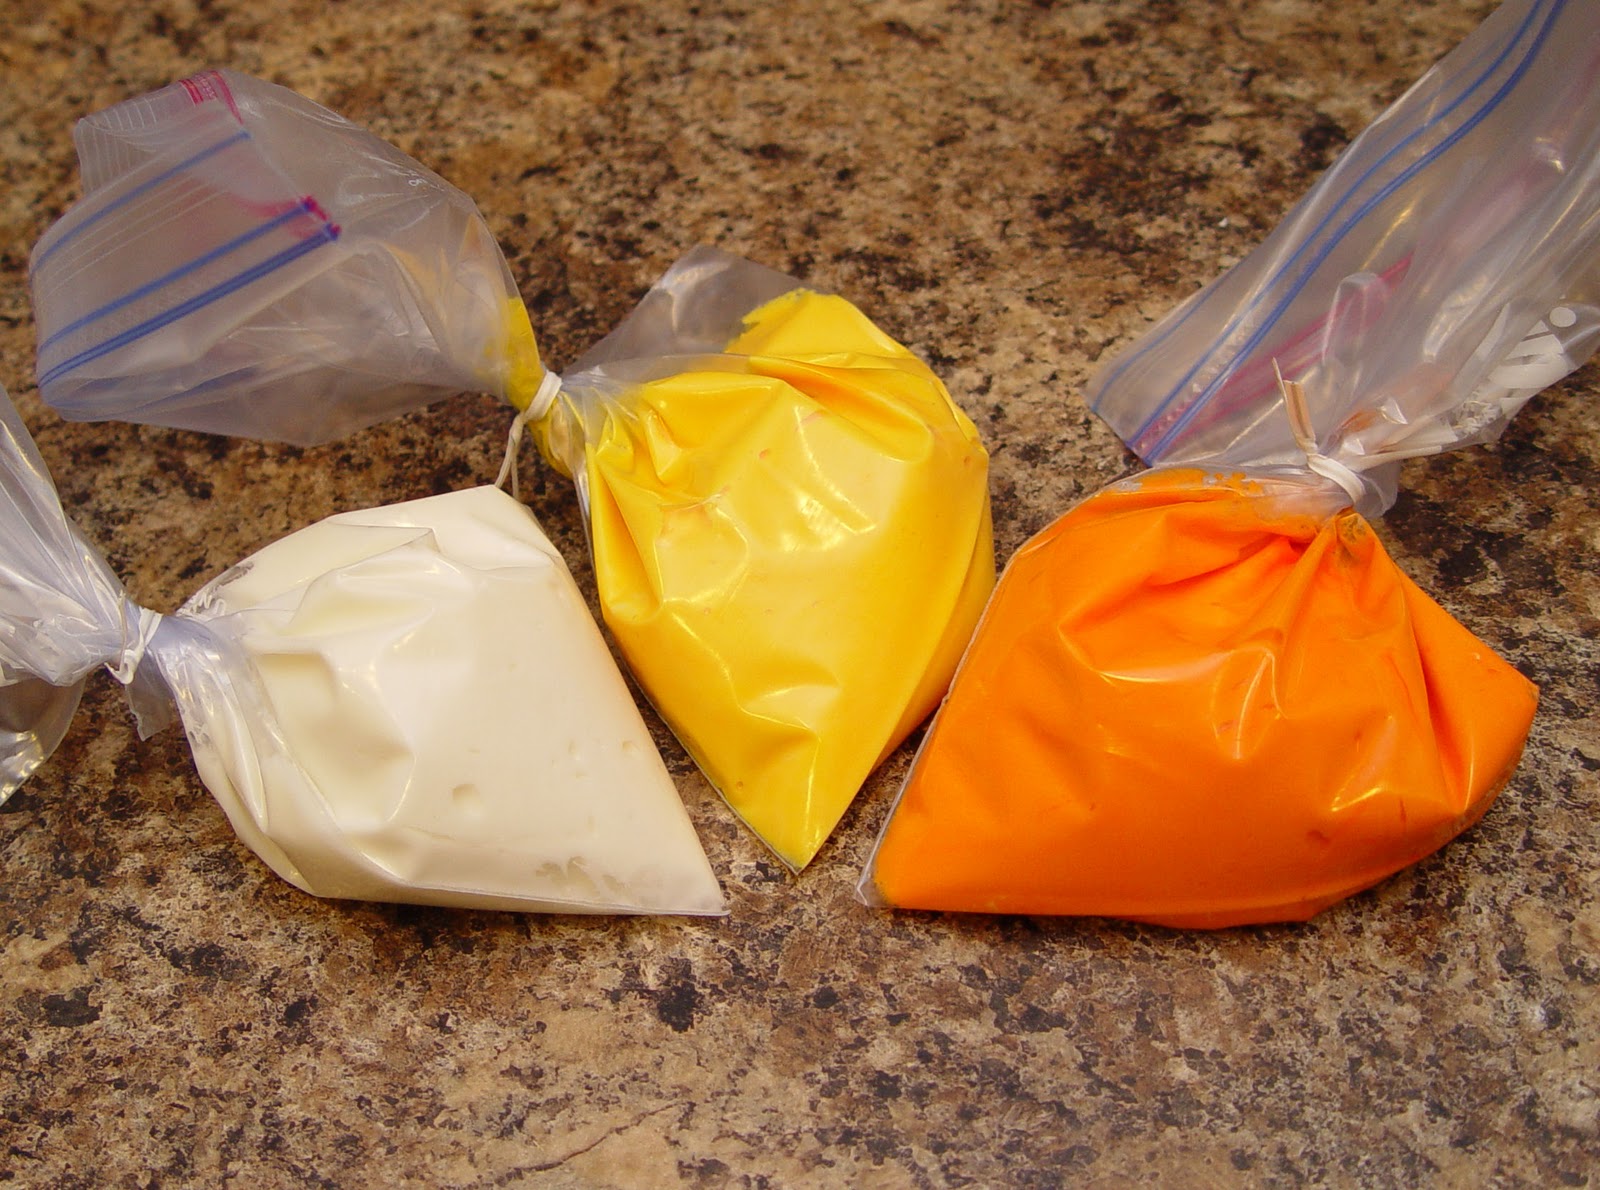
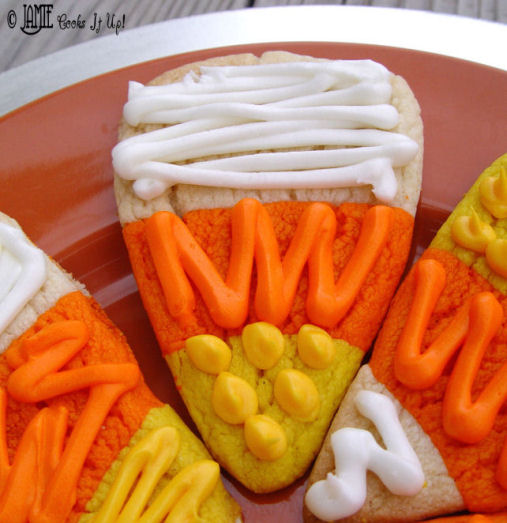
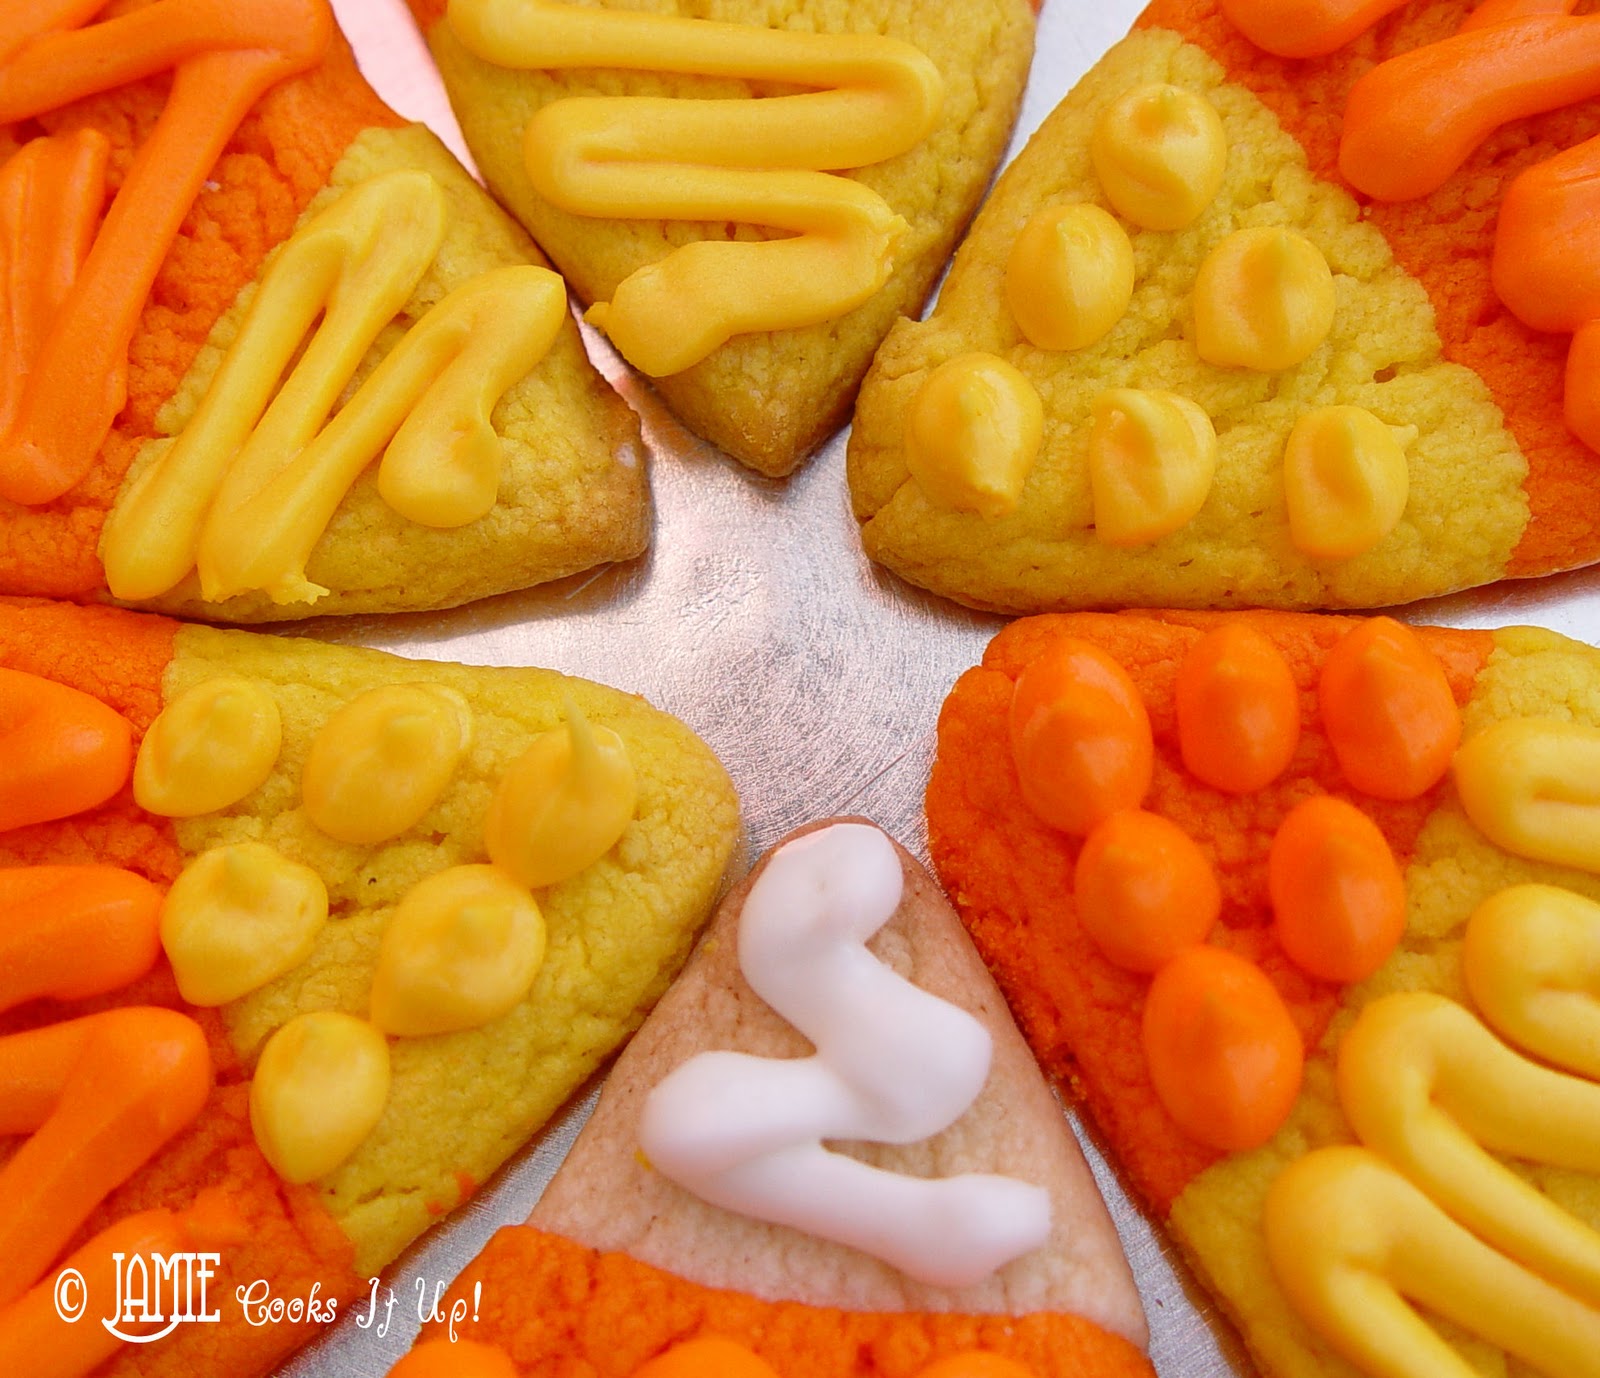
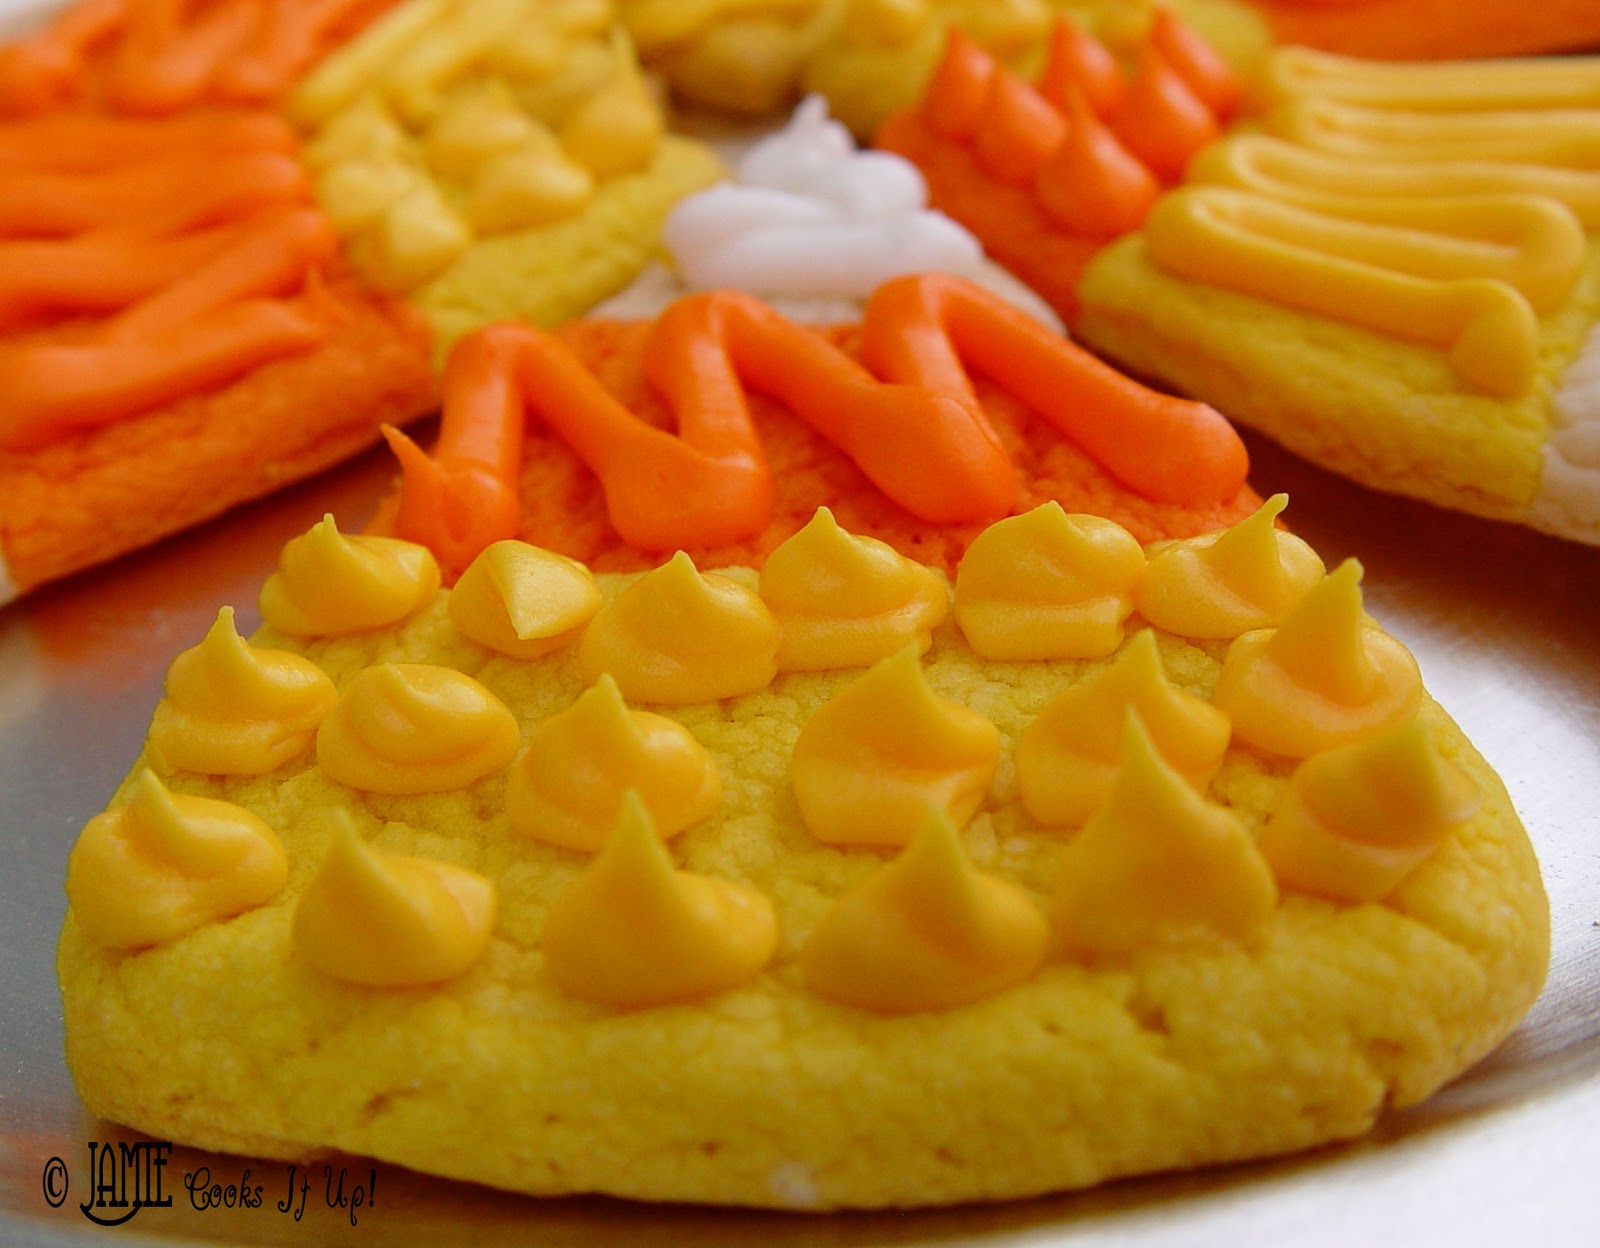
3. Place each color in it’s own zip lock bag and tie the top with a twist tie. Cut a small tip in the end and decorate your cookies as desired!
Good Luck! Have a fun time!

Ingredients
- Cookies:
- 2 white cake mixes (I used Duncan Hines)
- 1 C melted butter
- 2 eggs
- 5 T sour cream
- 1/4 C flour
- 1/2 t almond extract (or vanilla)
- 1/2 t yellow food coloring gel
- 1/2 t orange food coloring gel
- Frosting:
- 6 T softened butter
- 3 C powdered sugar
- 1/4 t almond extract (or vanilla)
- 4-5 T milk
Instructions
1. Mix all cookie ingredients (except the food coloring!) in a stand mixer, or with a wooden spoon until nicely combined.
2. Split the dough into thirds. Add the yellow food coloring to one section and the orange to another. Split each color into two sections. With a rolling pin roll each section (you should have 6 now, 2 of each color) into a rectangle. Mine were about 9 inches long and 4 inches wide. Now, you don't need to be this exact. The most important thing is that all of the sections are rolled out to be about the same size. Don't worry about it being perfect. Perfect is EXTREMELY overrated and not very fun, actually.
3. Take a pizza cutter and cut each triangle into thirds.
4. Gently place a yellow, orange and white strip of dough together. Press the seams down a bit with your fingers so they begin to stick. Again with the "they don't need to be perfect." If the strips break a bit while you are moving them around, don't sweat it! Just press them back together and all will be well.
5. Take a sharp knife and cut the strips into triangles. You can see here that there are two little triangles left at each end. I actually ended up rolling these into balls and baking them as round cookies. You could do that, or just eat the dough. Or just bake some small triangles. What ever suits your fancy.
6. Gently place each cookie on a cookie sheet. I used a spatula, slipping it under each triangle to help assist it to the sheet. Some of them came a part just a bit, but no worries! Just press the seams back together on the sheet. The baking really helps to fuse them together.
7. Bake at 350 for 8 minutes. (For Convection Ovens bake at 325 for 6 1/2 minutes.) Let them cool completely on a wire rack before frosting.
FROSTING
1. In a stand mixer, or with hand held beaters mix all frosting ingredients excepting the food coloring. Beat it well! You want it to have a bit of a whipped feel to it.
2. Divide the frosting into thirds and place in separate bowls. Color the frosting with the food coloring.
3. Place each color in it's own zip lock bag and tie the top with a twist tie. Cut a small tip in the end and decorate your cookies as desired!
Good Luck! Have a fun time!
Recipe from Jamie Cooks It Up!

Absolutely LOVE these cookies!
The October menu looks so good! And the cookies do too!!
I'm a total candy corn fan so will definitely give them a try!!
Those are cute!
ok, seriously those are adorable!!! I WILL be making these ASAP
I made candy corn coookies last year but they were not frosted. I really need to make them again. You menu looks awesome as usual.
These turned out absolutely darling!
Truly adorable. And since I'm not a big fan of actual candy corn, I would much prefer these cookies instead.
Your menu sounds delicious. I can't wait for some of those recipes. My mother in law made your taco soup on Saturday and it was so good. Thank you. Those cookies look so good too. I can't wait to try them. Thank you. How is the hillside holding up with with rain? I hope you don't get a mudslide to top off all the ash and smoke you had to deal with.
These are so fun! I really need to get into the kitchen now.