This post may contain affiliate links. Please read our disclosure policy.
Well my Christmas lovin’ friends…
I have a bit of a confession to make.
As of a couple of weeks ago,
I was done baking and photo-ing Christmas goodies for you all.
Done.
Finished.
Had started eating a large amount of vegetables and rice, just on account of it all.

Then…I got a little bit cookie-wowed.
I read all about a fun little cookie making day on
The Pioneer Woman’s site.
And, I’m embarrassed to say….
that I haven’t been able to stop thinking about
cute cookies
ever since.
Nor have been able to stop looking at them…
And reading about them….
And swooning over them.
This is the kind of sick and twisted person I am.
Lover of cute things
and lover of food.
Put those things together and I’ve got a real problem on my hands.
Somebody. Stop Me.
Before I hurt myself.
Vegetables and Rice just aren’t quite as cute or fun.
Hate to break it to you…
But it’s the darn spankin’ truth.
I will give a bit of a warning, however.
These Cute Cookies are not difficult to make,
but they do take quite a bit of time.
If time is something you are short on,
don’t add this to your list of “pre-Chritmas activities”!
If you are finding your presents wrapped,
your carols sung
and time just a slowly
ticking
by….
then treat your self to a fun little cookie day!
Or two…
Or three.
I know I will be.

Scroll to the bottom of the page for the full recipe. Here are some step by step instructions and pictures for making decorating with the glaze icing.
1. Use a whisk to combine the powdered sugar, lemon juice, and corn syrup in a medium sized bowl.
2. Add the milk just a drop or two at a time. You are working towards two different consistencies here.

The thicker frosting should be about the consistency of toothpaste. You are going to use it to pipe around the edges of your cookies.
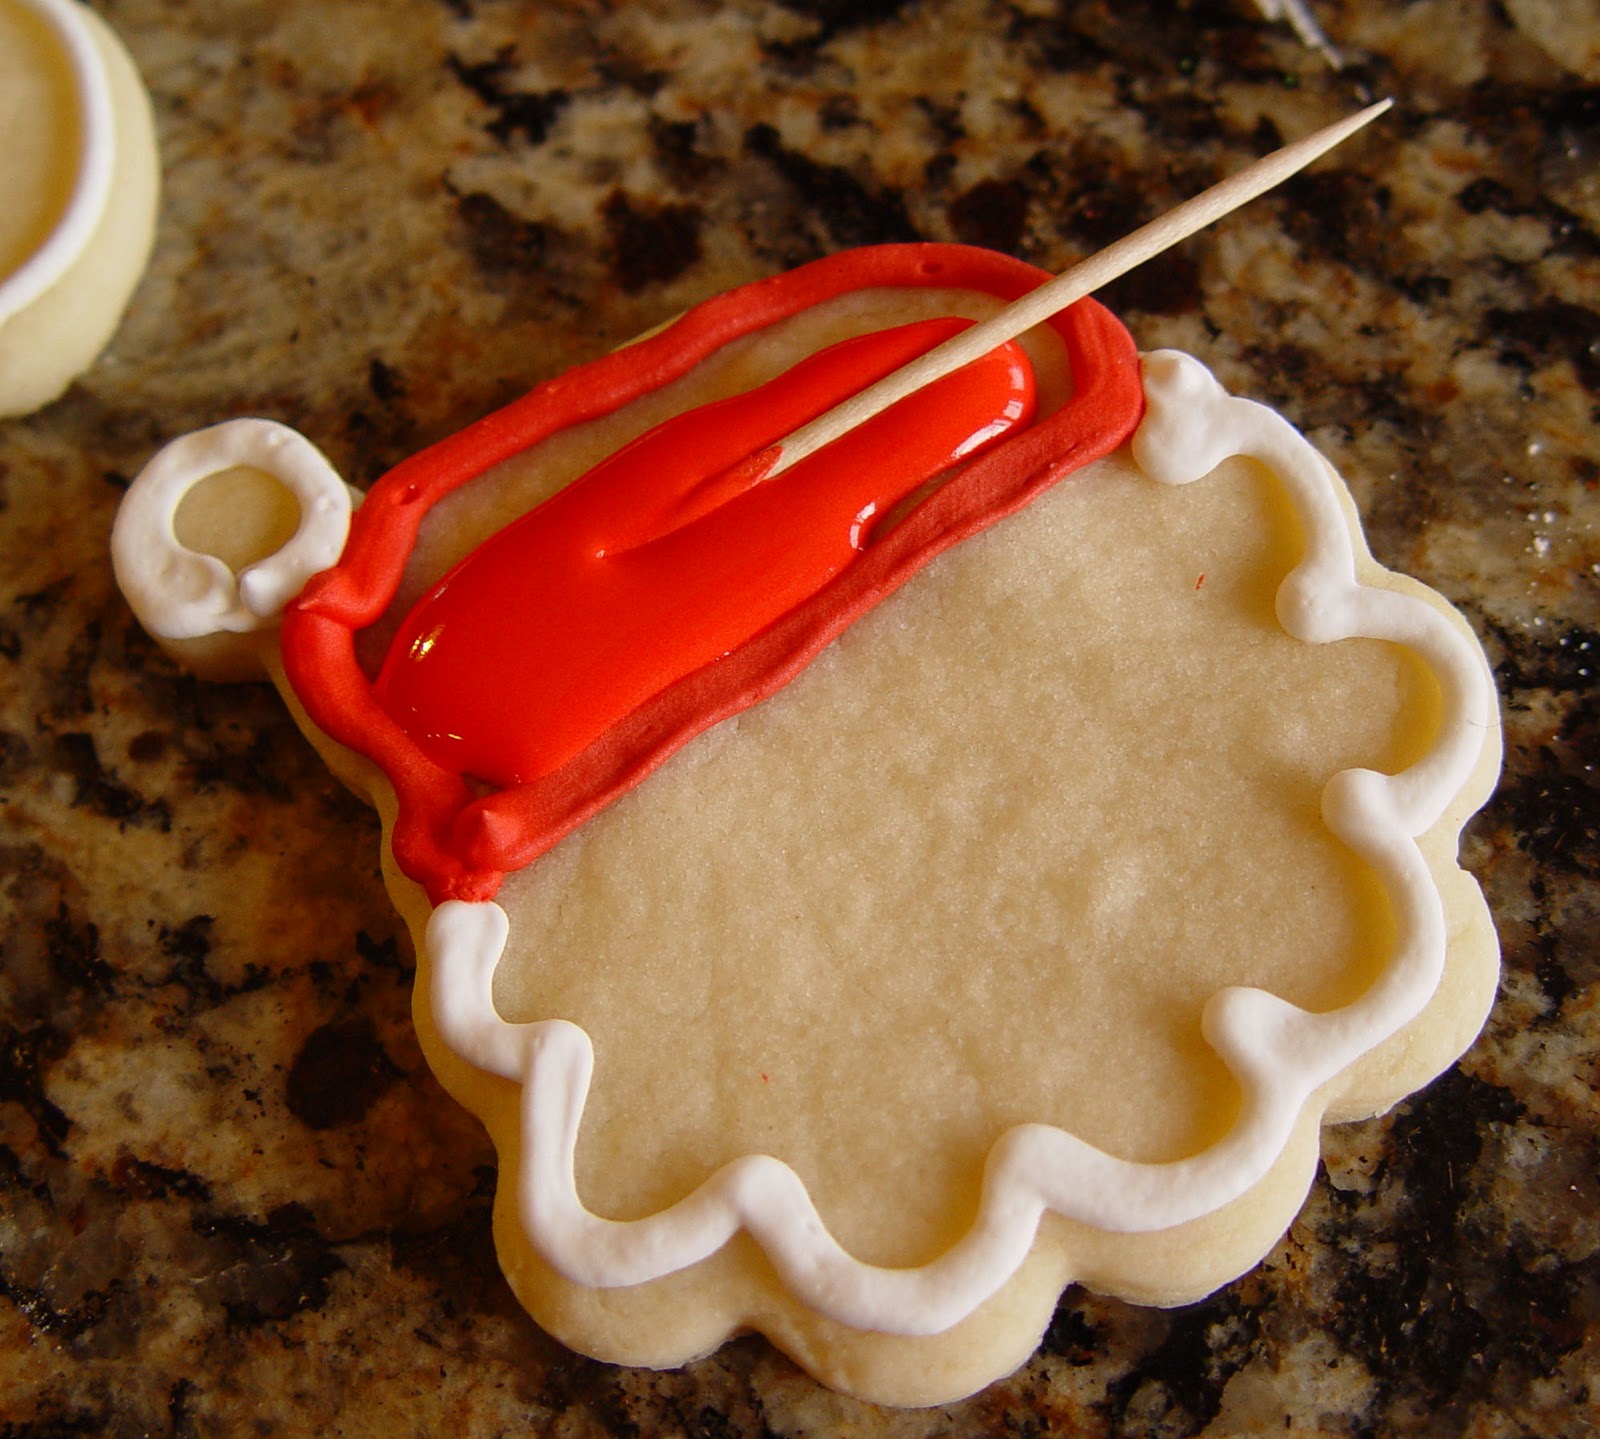
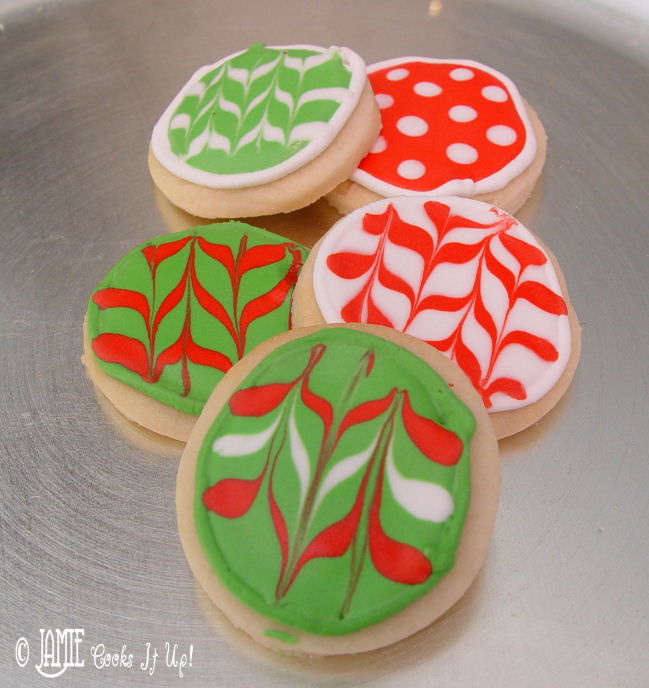
You will also need a thinner icing used to “flood” the cookies. The thinner icing should resemble syrup. Add the milk to your icing with these two consistencies in mind. Add your food coloring and you are good to go! Pipe the thicker frosting around the edges of your cookies. Let it harden for about 10 minutes, then fill in your cookie with the thinner frosting.

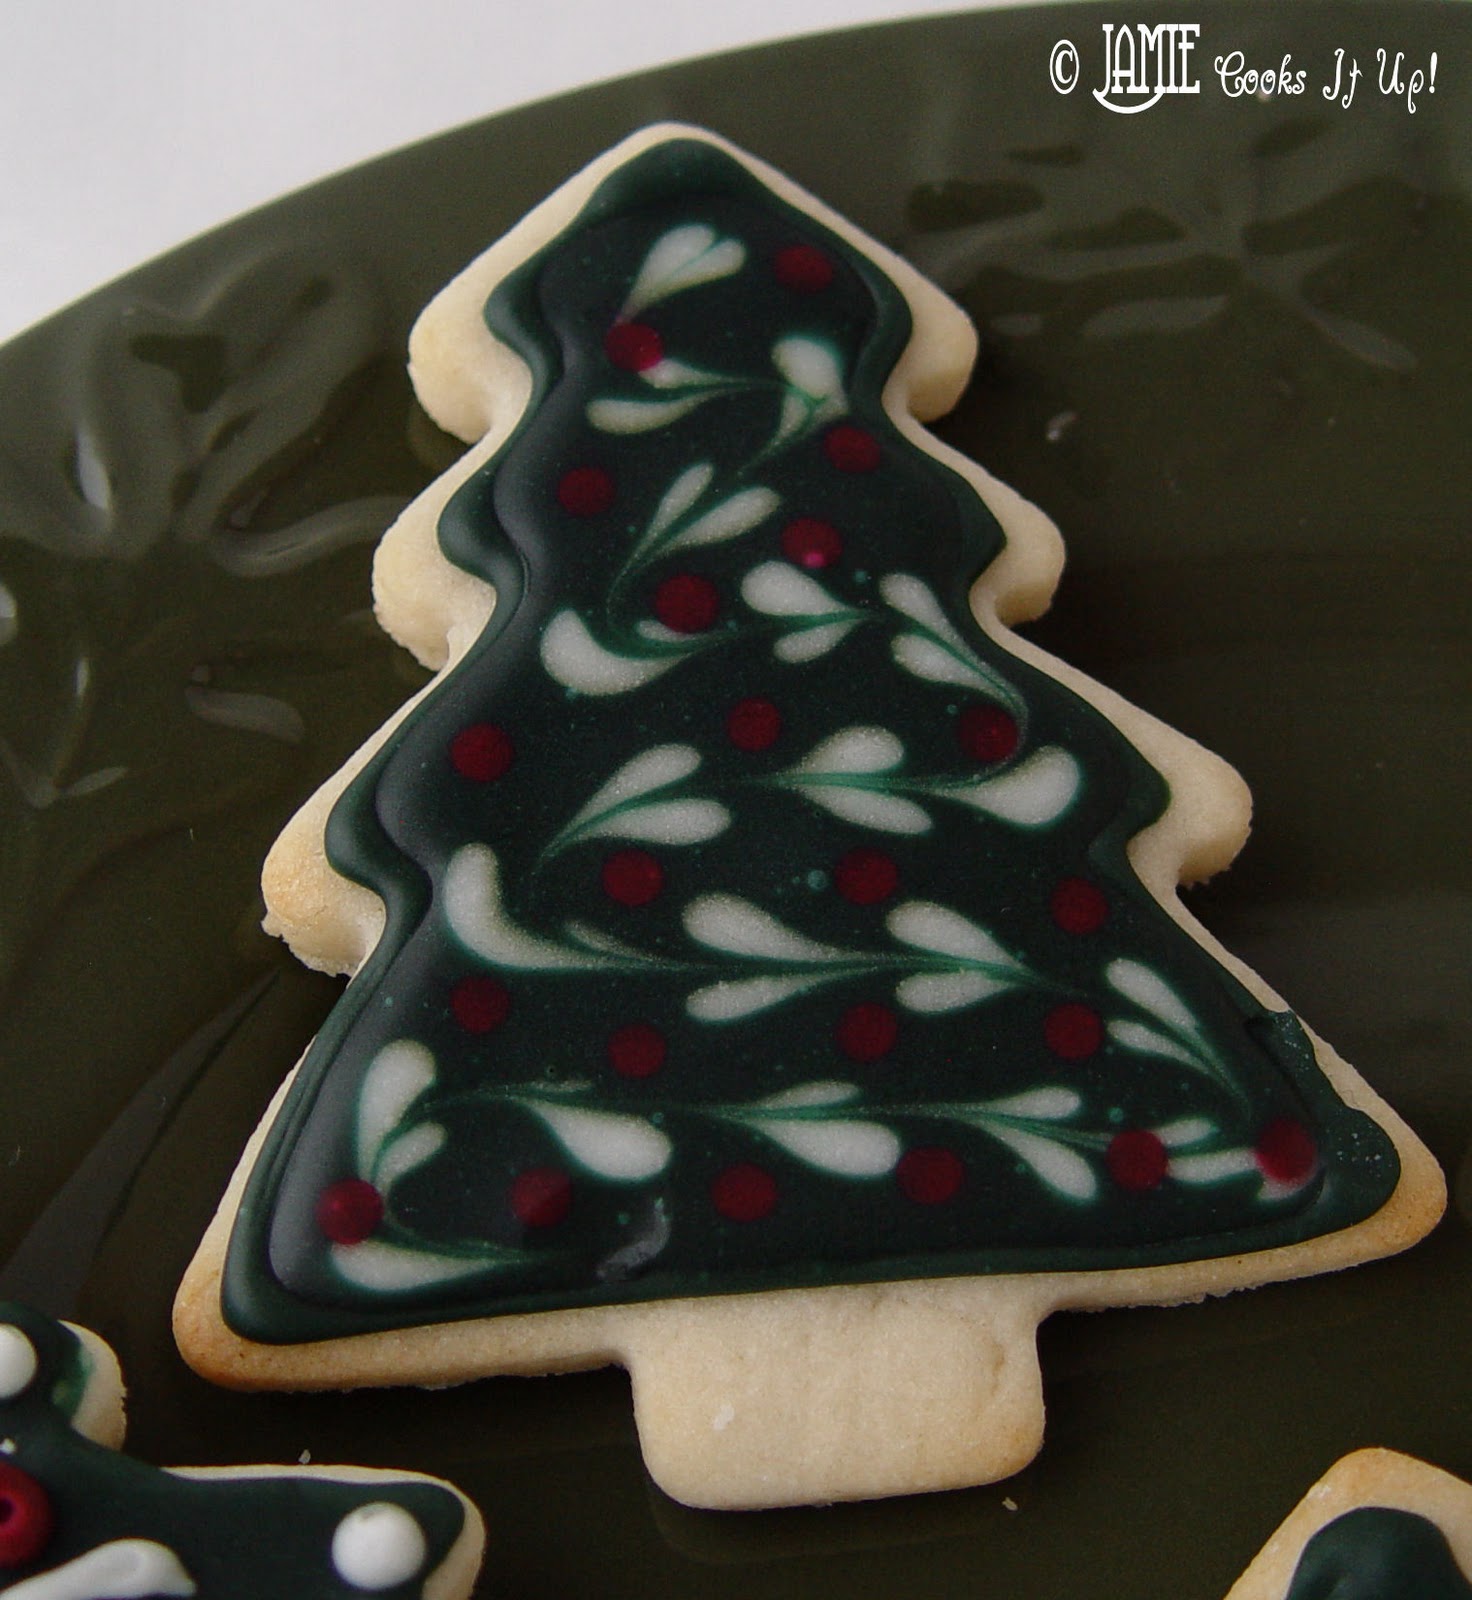
You can make some really fun designs by using two colors of the thinner frosting. For the cookie above, I piped the thicker icing around the edge. Then filled it with thin white frosting. I then piped some thin red icing in lines and finished it by dragging a toothpick through the lines. Fun….oh so fun.
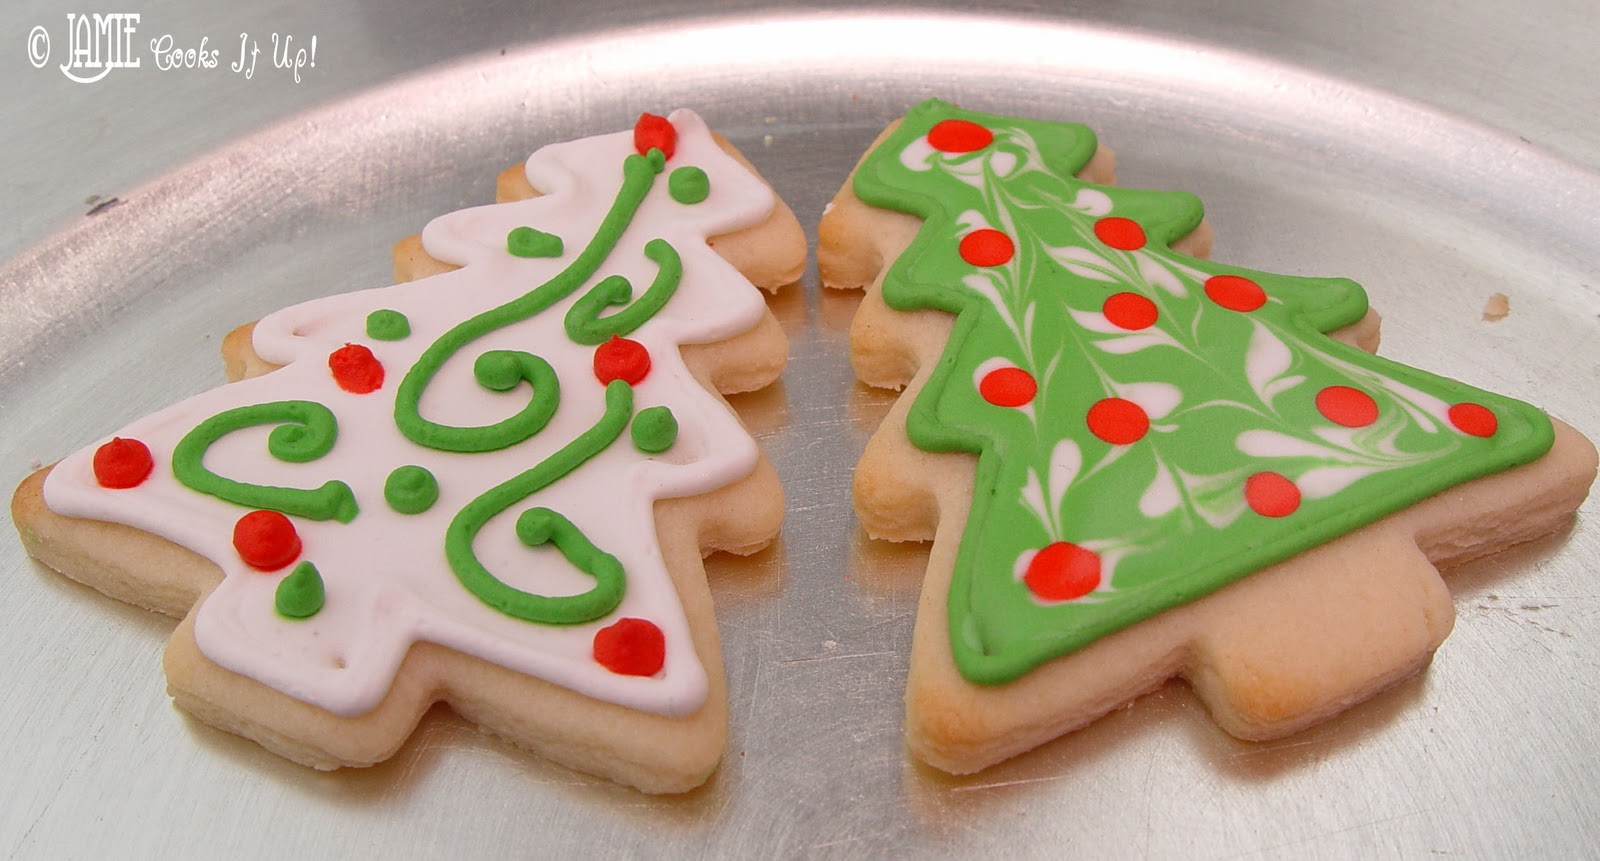
You can see that the cookie on the right has three colors of the thin frosting. The cookie on the left only has white thin frosting, the red and green were piped with thick frosting.
After the cookies are all prettied up, they need to sit out and dry for several hours. I made the mistake on my first batch of covering them with plastic wrap just after they were done. The next time I saw them, the colors had bled into each other…and I was a bit bummed out! Not so fun. I didn’t curse or anything. It is Christmas you know. I’m trying to be extra nice and all.

After they have had a chance to dry look how fun and stack able they are!

I skipped the thin frosting on this cookie and just piped the thicker frosting all over the top.
Enjoy and have a fun old time!

Ingredients
- COOKIE INGREDIENTS:
- 3 C flour
- 2 t baking soda
- 1 C sugar
- 1 C butter, cold
- 1 egg
- 3/4 t pure vanilla extract
- 1/2 t pure almond extract
- ICING INGREDIENTS:
- 1 C powdered sugar
- 1 T milk
- 1 drop lemon juice (fresh or from the bottle)
- 1 T light corn syrup
- Americolor Food Coloring (I found some at my local Hobby Lobby)
Instructions
COOKIE INSTRUCTIONS:
1. Combine the flour and baking soda in a medium sized bowl.
1. Combine the flour and baking soda in a medium sized bowl.
2. In your stand mixer, or with hand held beaters cream the butter and sugar. Add the egg and extracts and mix well.
3. Add the flour mixture a little bit at a time and beat just until combined. Be sure to scrape the sides and bottom of the bowl.
The dough will be a bit crumbly.
4. Place the dough on a floured surface and knead to help it from crumbling all over.
5. Roll out 1/2 of the dough on your floured surface. Cut into what ever cookie shapes your little heart desires. Place on a sprayed cookie sheet and bake at 350 for 10 minutes. (Convection ovens bake at 325 for 7 minutes.) I like sugar cookies to be pretty soft, so I tend to under cook them. I took mine out of the oven when they were just starting to get golden around the edges. They ended up being soft and yummy for several days.
6. Cool on a wire rack.
ICING INGREDIENTS:
1. Use a whisk to combine the powdered sugar, lemon juice, and corn syrup in a medium sized bowl.
2. Add the milk just a drop or two at a time. You are working towards two different consistencies here. The thicker frosting should be about the consistency of toothpaste. You are going to use it to pipe around the edges of your cookies. You will also need a thinner icing used to "flood" the cookies. The thinner icing should resemble syrup. Add the milk to your icing with these two consistencies in mind. Add your food coloring and you are good to go!
3. Pipe the thicker frosting around the edges of your cookies. Let it harden for about 10 minutes, then fill in your cookie with the thinner frosting. You can make some really fun designs by using two colors of the thinner frosting. After the cookies are all prettied up, they need to sit out and dry for several hours. I made the mistake on my first batch of covering them with plastic wrap just after they were done. The next time I saw them, the colors had bled into each other...and I was a bit bummed out!
3. Pipe the thicker frosting around the edges of your cookies. Let it harden for about 10 minutes, then fill in your cookie with the thinner frosting. You can make some really fun designs by using two colors of the thinner frosting. After the cookies are all prettied up, they need to sit out and dry for several hours. I made the mistake on my first batch of covering them with plastic wrap just after they were done. The next time I saw them, the colors had bled into each other...and I was a bit bummed out!
Notes
Americolor brand food coloring works best for these.
Recipe for cookies from Bake at 350
Recipe for icing from I am Baker

How’s the cookie? Soft or crisp ?
We did not like this cookie. Had a metallic flavor after a few bites. Did not retain crisp cookie shape as baking soda makes cookies puff. However, your cookies are beautiful and liked all your suggestions for glazing. Out of six sisters, my niece had the BEST recipe – thick and soft and uses vanilla, almond and butter extract and baking powder.
Cannot print from link.
Pamela,
Thank you for letting me know. I’ve updated the post with a printable feature.
All the best,
~Jamie