This post may contain affiliate links. Please read our disclosure policy.

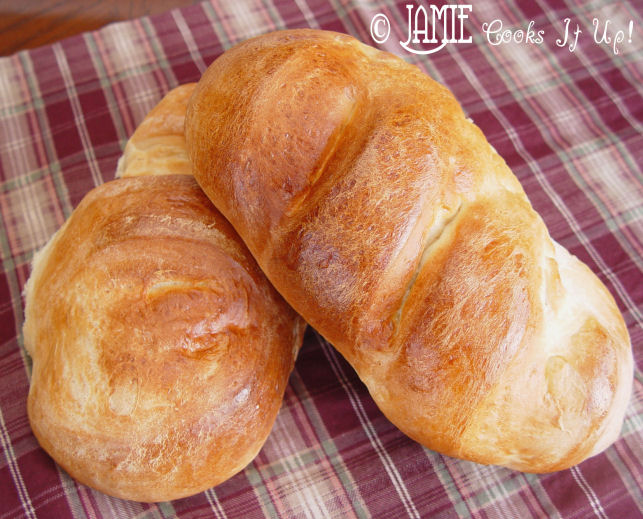
The recipe I have to share with you today, is one of my favorite recipes of all time. In fact if I had to pick a tippy top favorite, this one just might be it. I usually make this bread several times a month, I love it so much. I have shared it here, back in the early days of my blog. While doing a bit of house/blog keeping the other day, I came across the old, original Fabulous French Bread post and boy howdy. The step by step photos looked like the dogs dinner, man. Terrible! Just ferocious. You know I couldn’t let my Favorite Recipe Of All Time hang around here looking like the dogs dinner, now could I. And so I am sharing it again with you today, polished up and hopefully a lot more appealing to look at. If you haven’t tried it yet, give it a go! Don’t be afraid of a little tiny thing like yeast. Good heavens, you could totally be rocking this bread. Here are some great reasons to make it.
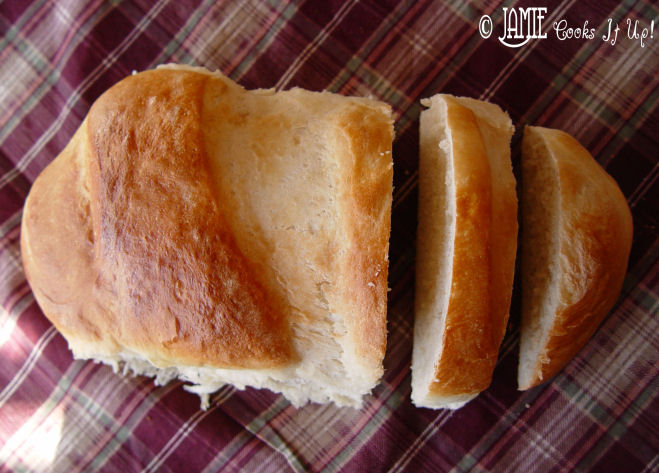
The outside is crusty while the inside is soft and slightly chewy.
It freezes like a dream, I generally double or triple the recipe and freeze the leftover loaves for another meal.
It is cheap, cheap, cheap. I did the math once, and I think it came out to costing 15 cents per loaf.
It is a Soup Companion Extraordinaire, this bread makes any soup taste like a Soup Rock Star, seriously.
It also makes….
Fabulous Sandwiches, like this one here.
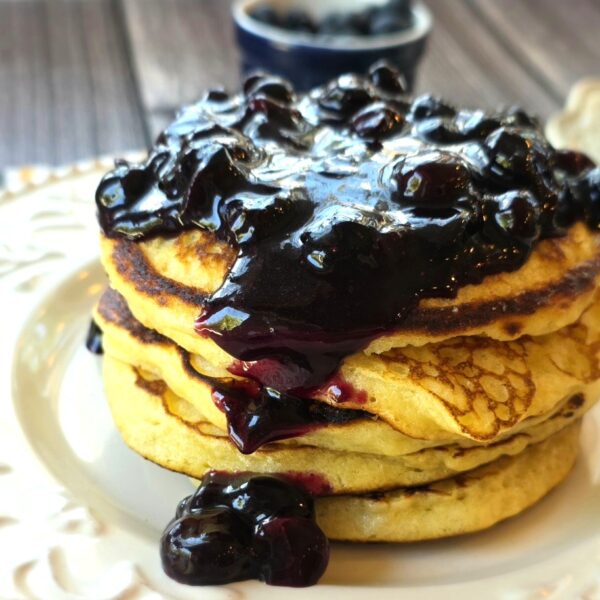
Wonderful French Toast
Killer French Bread Pizza
Easy Garlic Cheese Bread
Have I talked you in to making it yet? Boy, I sure hope so…let’s do it!

Let me show you how to make it happen!
1. Preheat your oven to 170 degrees.
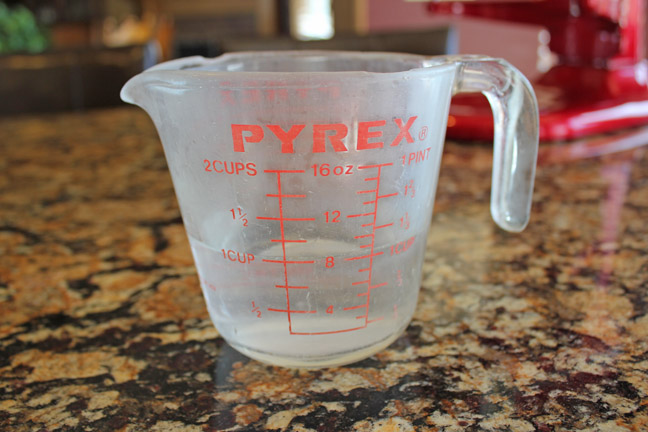
2. Fill a glass measuring cup with 1 cup of water. Pop it into the microwave and heat it for 3 minutes, or until the water is boiling.
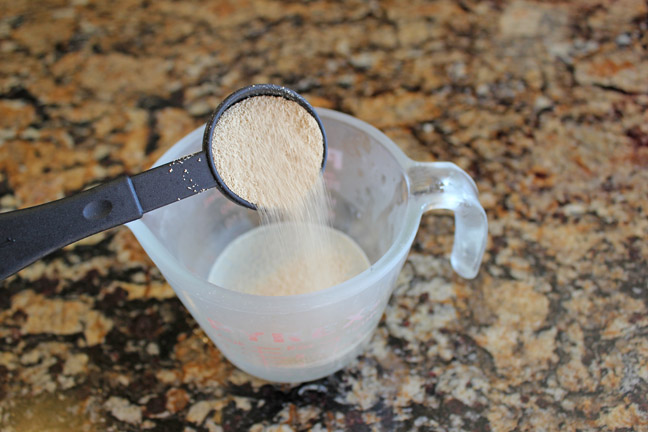
2. Pour 1/3 C of warm water into a glass measuring cup. Sprinkle 1 Tablespoon of yeast over the top of the warm water…
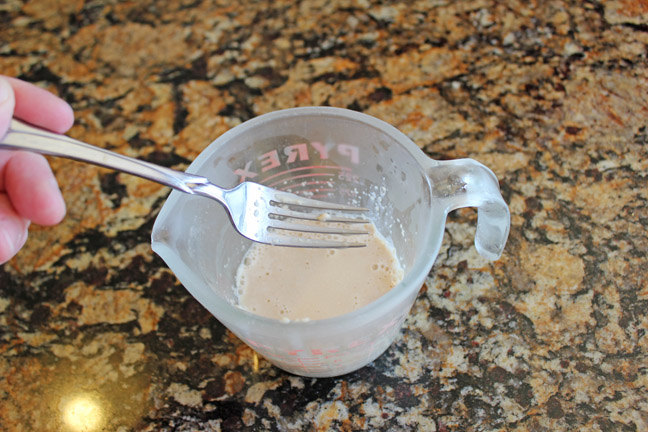
grab yourself a fork and stir the yeast into the water. Keep working it in until it is completely dissolved.
3. Into your stand mixer place 2 Tablespoons of sugar,

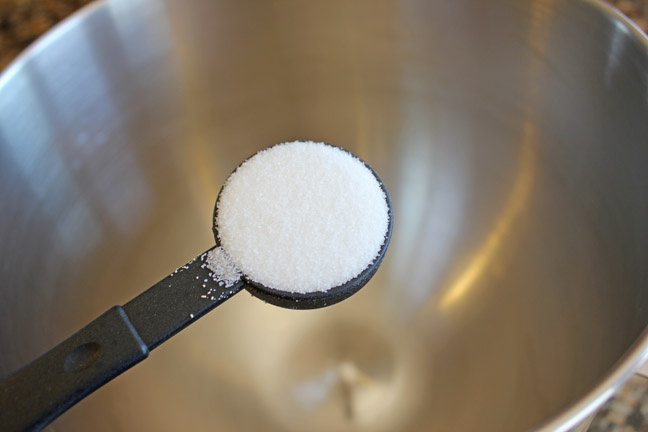
1 Tablespoon of salt 
and 1 Tablespoon of shortening.
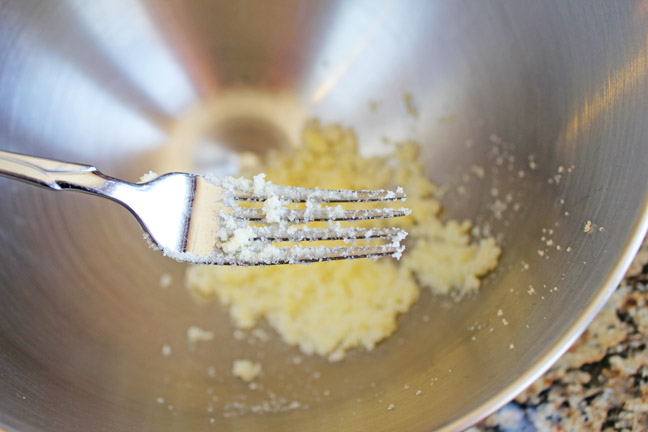
Grab a fork and mash these ingredients together,

like this. 🙂

4. Pour the boiling water over the sugar/shortening mixture.
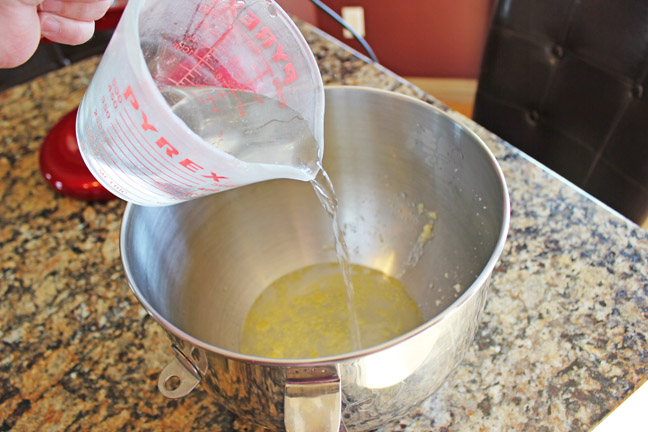
Add 1 cup COLD water (cold water from the kitchen faucet will be fine) into the mixer.
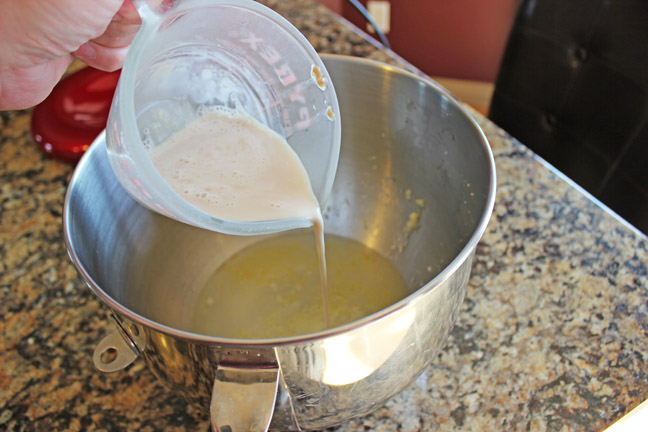
Grab the yeast/water mixture and pour that in as well.
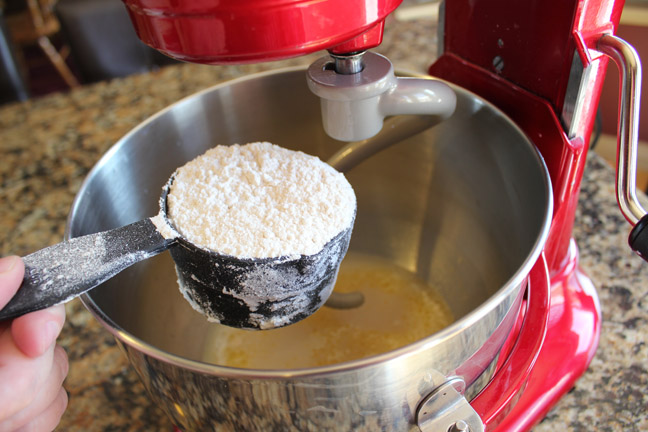
5. Add 2-3 cups of flour and turn on your mixer to slow speed. You want to be sure to use the dough hook attachment.
6. While the mixer is on, add the remaining flour, 1 cup at a time until the dough is firm enough to pull away from the sides of the mixing bowl.

Like this. Once you have enough flour turn the mixer to medium speed (high-speed if you are using a Bosch) and let the dough mix for 6-8 minutes.
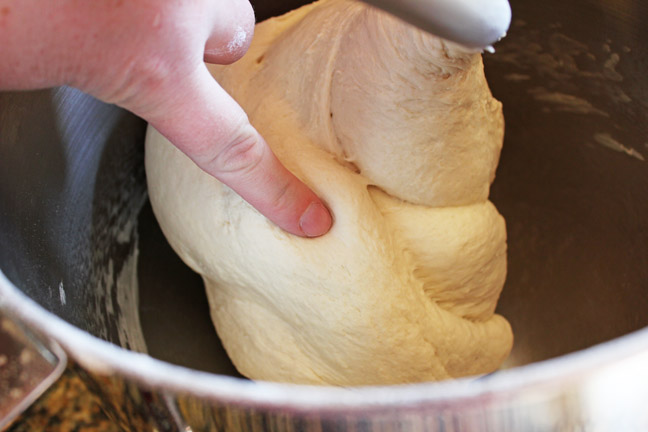
7. The dough should have a nice elasticity to it, and not be overly sticky. If you press your finger into the dough and it springs back you are good to go.

Also, if a little bit of it stays on our finger when you test the dough, that’s just fine. If your dough is sticks like crazy to your finger, I would add a little more flour (about 1/4 cup) and let it mix for another minute.
8. Once the dough is mixed, let it rest in the bowl for 5 minutes.
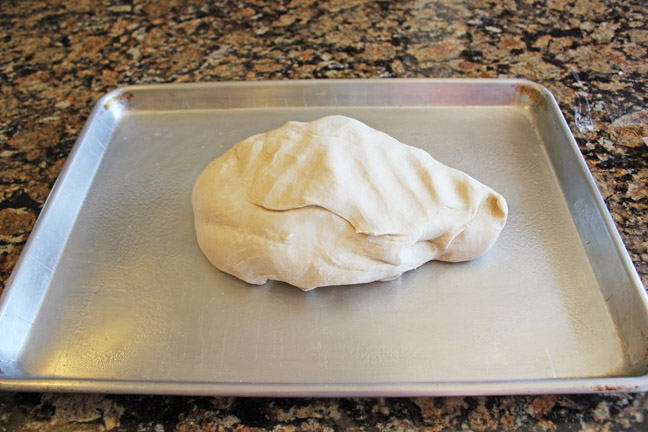
9. Spray a large cookie sheet with cooking spray and dump the dough out onto it.
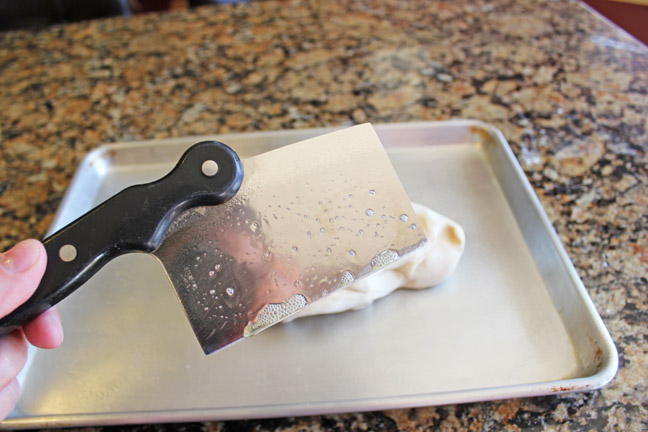
10. Take a sharp knife and spray it with cooking spray.

Cut the dough into three equal parts. Then let it rest for another 5 minutes. Be patient. 🙂 If you don’t let it rest the dough will be hard to shape and manipulate, then you might do something fierce like pull all your hair out. We wouldn’t want that, now would we. Especially if you’ve got thin hair to begin with. Wait the 5, won’t you?
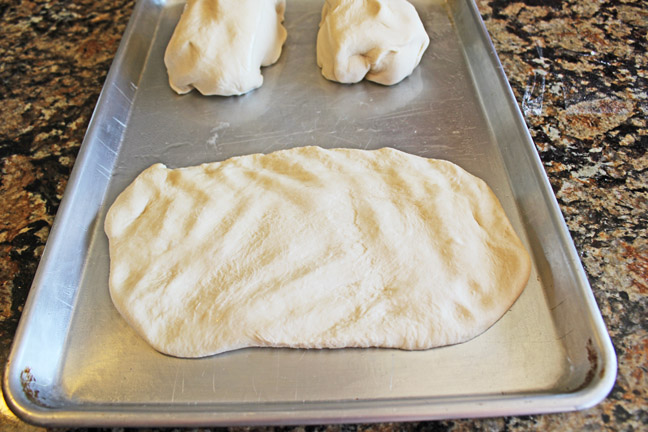
11. Take one section of dough and spread it out into a rectangle. No need to use a rolling pin, just press it out with your hands.
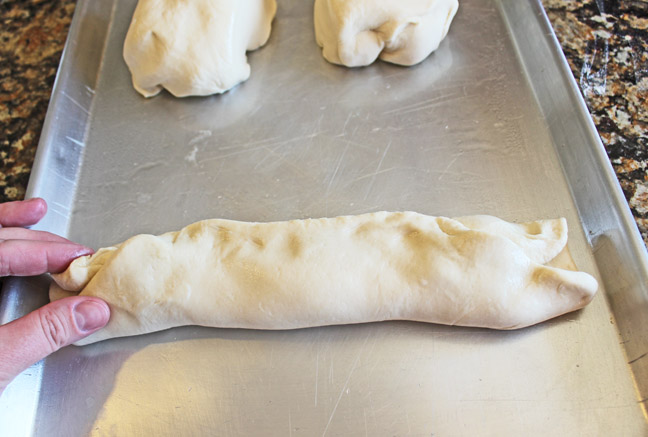
12. Roll both of the long ends up and over one another.
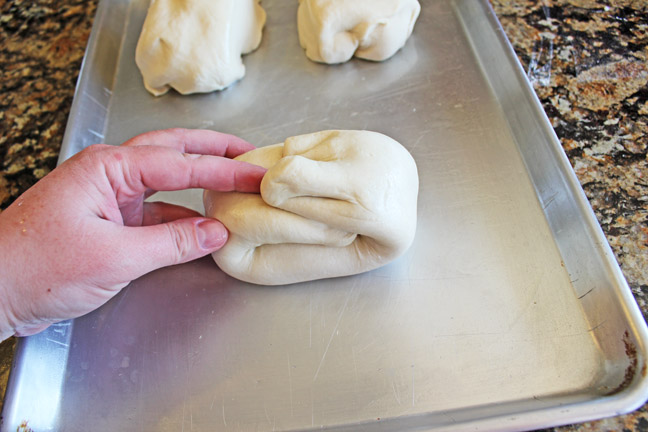
Then bring the sides up
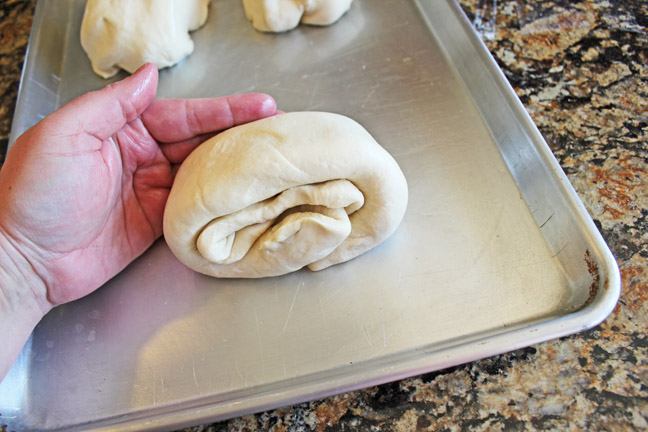
and turn your little loaf over, so the flat side is on top, and the seam side is on the bottom.
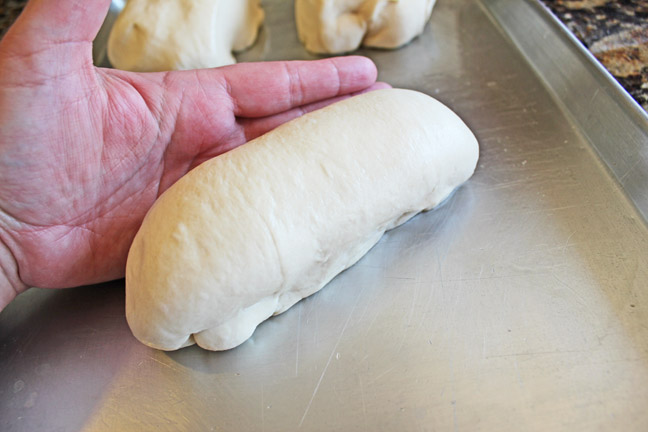
Use your hands to tuck the seams under the loaf so you have a nice even side to your loaf, with the seams being hidden underneath.
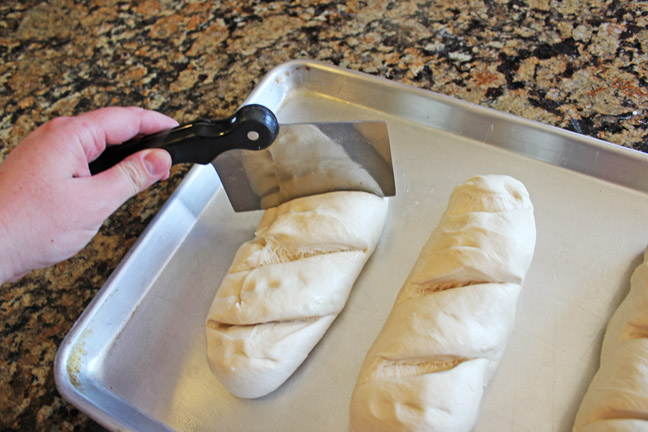
13. Cut three or four angled slits in each loaf, making sure not to cut through to the bottom of the loaf.
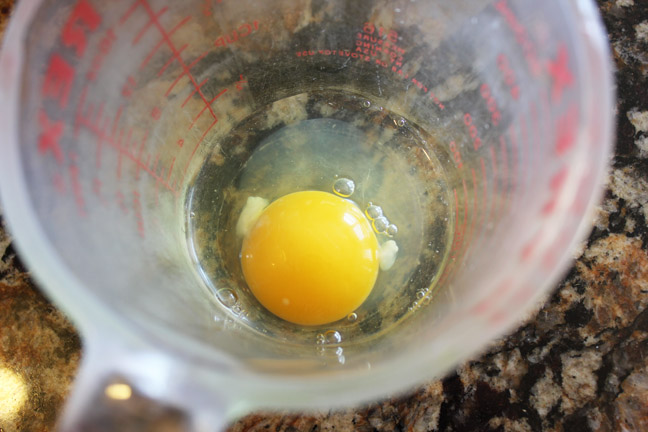
14. Crack an egg into a small bowl or measuring cup
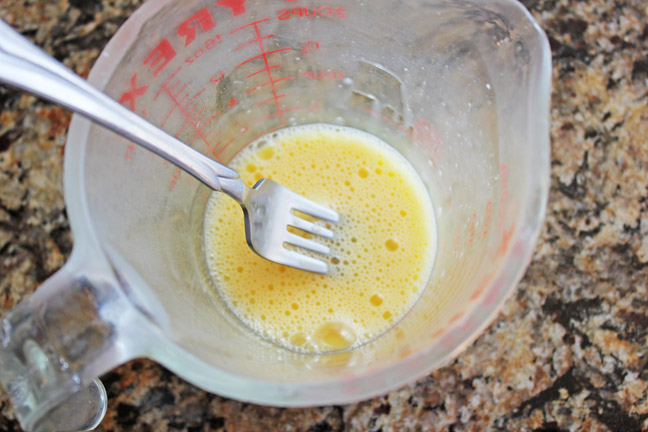
and whisk it up with a fork. You want it to get nice and frothy.
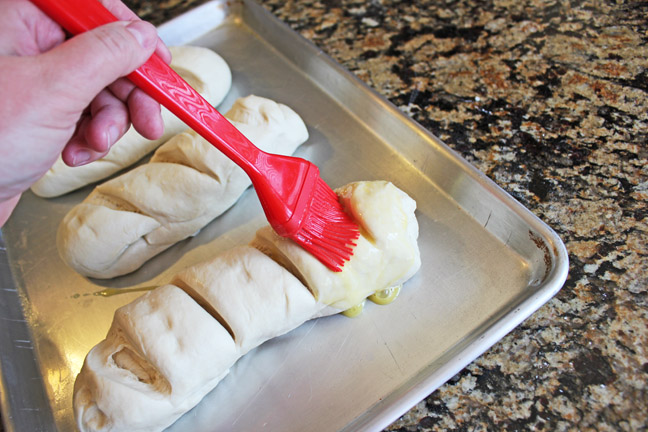
15. Spread the frothy egg out over the top of each loaf. Make sure to get some down inside the slits as well. This egg is going to make your loaves shine like the top of the Crysler Building. (Name that movie, anyone?)
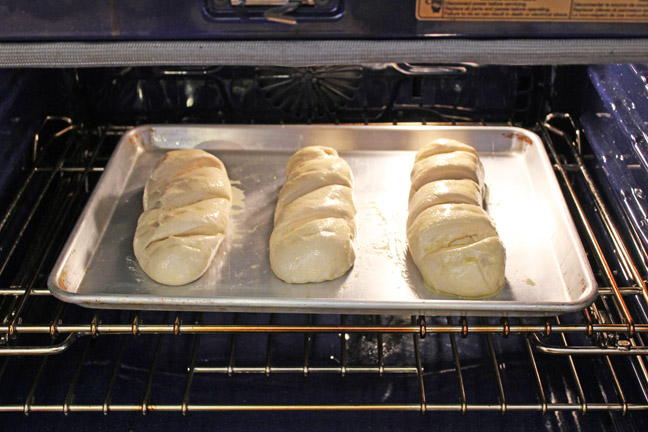
16. Pop your lovely loaves into the oven and let them rise for about 15 minutes,
or until they are just about doubled in size.
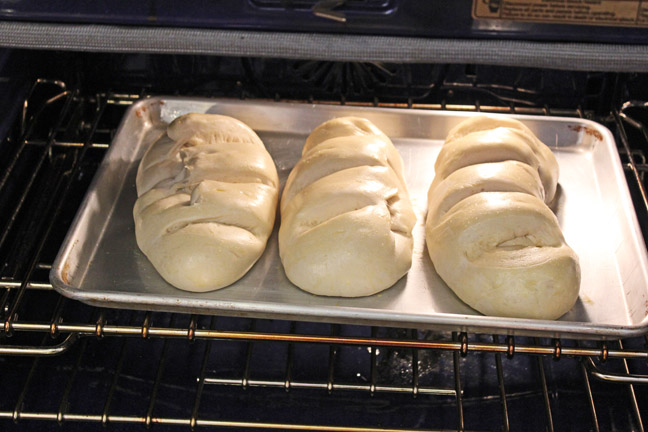
17. Turn your oven up to 400 degrees (don’t take the loaves out of the oven while the temperature increases, just leave them be).

18. Allow the loaves to bake for 15-20 minutes (this time may vary depending on how fast your oven increases in temperature) or until the tops are golden and crisp.
19. Turn the oven down to 350 degrees and bake for an additional 10 minutes.
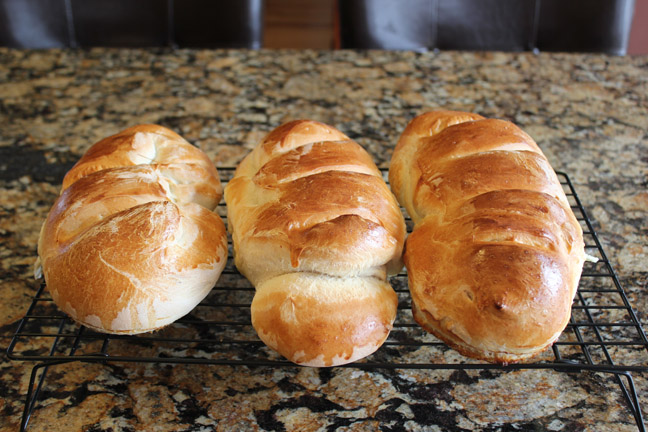
20. Remove the loaves from the pan and allow them to cool a bit before you slice into them.
Place leftovers in a Freezer Safe Ziploc Bag and pop them into your freezer.
Enjoy!!!
Ingredients
- 1 C boiling water
- 1/3 C warm water
- 1 T yeast (I use active dry)
- 2 T sugar
- 1 T salt
- 1 T shortening (I use butter flavored Crisco)
- 1 C cold water
- 5-6 cups flour (I use all-purpose flour)
- 1 egg
Instructions
1. Preheat your oven to 170 degrees.
2. Fill a glass measuring cup with 1 cup of water. Pop it into the microwave and heat it for 3 minutes, or until the water is boiling.
3. Pour 1/3 C of warm water into a glass measuring cup. Sprinkle 1 Tablespoon of yeast over the top of the warm water grab yourself a fork and stir the yeast into the water. Keep working it in until it is completely dissolved.
4. Into your stand mixer place 2 Tablespoons of sugar, 1 Tablespoon of salt and 1 Tablespoon of shortening. Grab a fork and mash these ingredients together.
5. Pour the boiling water over the sugar/shortening mixture. Add 1 cup COLD water (cold water from the kitchen faucet will be fine) into the mixer. Grab the yeast/water mixture and pour that in as well.
6. Add 2-3 cups of flour and turn on your mixer to slow speed. You want to be sure to use the dough hook attachment.
7. While the mixer is on, add the remaining flour, 1 cup at a time until the dough is firm enough to pull away from the sides of the mixing bowl. Once you have enough flour turn the mixer to medium speed (high-speed if you are using a Bosch) and let the dough mix for 6-8 minutes.
8. The dough should have a nice elasticity to it, and not be overly sticky. If you press your finger into the dough and it springs back you are good to go. Also, if a little bit of it stays on our finger when you test the dough, that's just fine. If your dough is sticks like crazy to your finger, I would add a little more flour (about 1/4 cup) and let it mix for another minute.
9. Once the dough is mixed, let it rest in the bowl for 5 minutes.
10. Spray a large cookie sheet with cooking spray and dump the dough out onto it.
11. Take a sharp knife and spray it with cooking spray.
Cut the dough into three equal parts. Then let it rest for another 5 minutes. Be patient. 🙂 If you don't let it rest the dough will be hard to shape and manipulate, then you might do something fierce like pull all your hair out. We wouldn't want that, now would we. Especially if you've got thin hair to begin with. Wait the 5, won't you?
12. Take one section of dough and spread it out into a rectangle. No need to use a rolling pin, just press it out with your hands.
13. Roll both of the long ends up and over one another. Then bring the sides up and turn your little loaf over, so the flat side is on top, and the seam side is on the bottom. Use your hands to tuck the seams under the loaf so you have a nice even side to your loaf, with the seams being hidden underneath.
14. Cut three or four angled slits in each loaf, making sure not to cut through to the bottom of the loaf.
15. Crack an egg into a small bowl or measuring cup and whisk it up with a fork. You want it to get nice and frothy.
16. Spread the frothy egg out over the top of each loaf. Make sure to get some down inside the slits as well. This egg is going to make your loaves shine like the top of the Crysler Building. (Name that movie, anyone?)
17. Pop your lovely loaves into the oven and let them rise for about 15 minutes, or until they are just about doubled in size.
18. Turn your oven up to 400 degrees (don't take the loaves out of the oven while the temperature increases, just leave them be).
19. Allow the loaves to bake for 15-20 minutes (this time may vary depending on how fast your oven increases in temperature) or until the tops are golden and crisp.
20. Turn the oven down to 350 degrees and bake for an additional 10 minutes.
21. Remove the loaves from the pan and allow them to cool a bit before you slice into them. Place leftovers in a Freezer Safe Ziploc Bag and pop them into your freezer.
Enjoy!!!


Just made this bread..it was so easy and delicious.
After it cooled down I cut a few slices and brushed them with olive oil and fresh pressed garlic and sprinkled a little cheese on top of them and put them back in the oven for five minutes. To die for!
Thanks so much for sharing this.
Vikki
Is there a way to print this recipe? I don’t see a print friendly button. Love this bread. Thanks!
Cheryl
After trying to make bread for years I have finally found a recipe I love! This is the best and easiest bread recipe ever. I love that I can make it after work and have hot bread for dinner, but that it stores so well too. I French toast with it this morning and it was the best French toast ever. Thank you for your wonderful recipes.
I had a loaf of this bread in the freezer. I used it to make savory french toast for breakfast yesterday (salt & pepper, parmessan, dijon mustard). Scrambled egg on top then topped with Hollandaise. Delicious!!
can you make it into buns as well
please
Loved this bread. I used margarine in place of shortening. I only made two long loaves. I mixed it up in my Bosch. Was fabulous with our Easter dinner.
Darlene,
Thanks for letting me know it turned out well! So happy to know it. 🙂
All the best,
~Jamie
What a beautiful recipe to read see&follow
Hi! I am absolutely LOVING this recipe, I’ve made it a few times trying to perfect it and the last 2 times turned out the best. The very last time I Split the dough into eight mini loaves and they were perfect as a Hoagie roll or sandwich roll. The thing I adjusted was the blooming of the yeast. I let it sit to bloom for up to 10 minutes so it’s nice and frothy. I found the bread lighter and less dense. This is my go to recipe for bread now!!
Lizzy,
So happy to hear it! Thanks for letting me know. 🙂
All the best,
~Jamie
I have been kitchen aid kneading this bread for 15 minutes and it still is not pulling away from the sides of the bowl. What did I do wrong?
Add a bit more flour, 1/4 cup at a time and mix a bit till it does.