This post may contain affiliate links. Please read our disclosure policy.
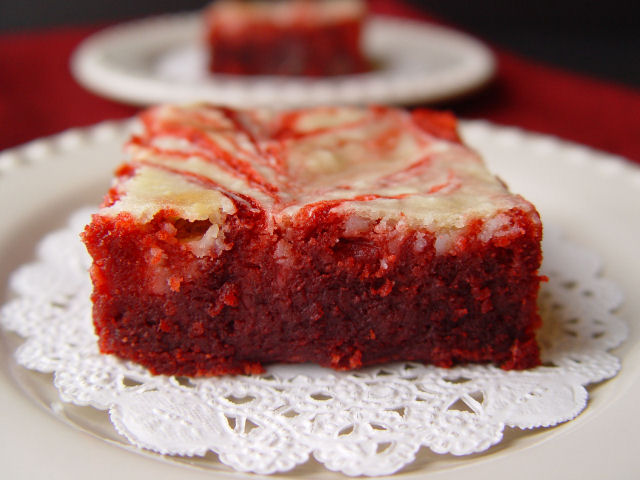
I double dog dare you to make this pretty little recipe.
Then I triple dog dare you NOT to eat 5 of them yourself. Because not eating 5 of them yourself with take skill.
And restraint.
And mental will power.
Of which I have none. See you at the gym, I will be there for the next 10 hours working off these brownies. Wish me luck. Cross your fingers that my knees hold out. 🙂
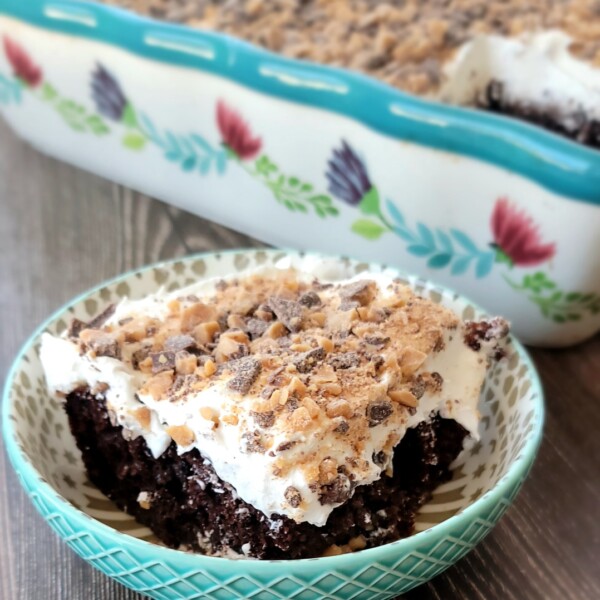
However, my fine friends if you have a better handle on your chocolate addicted life than I do, and want to make a mouth watering, decadent dessert for those you love (did you know Valentines day is coming up? You did! Well, aren’t you really somethin’) then make these Red Velvet Cream Cheese Brownies.
Because they are really somethin’.
Just like you.
And that’s no joke.


Ingredients
- Red Velvet Layer:
- 1 C butter, melted
- 2 C sugar
- 1/3 C unsweetened cocoa powder
- 4 eggs
- 2 t vanilla
- 1 1/2 C flour
- 1/2 t salt
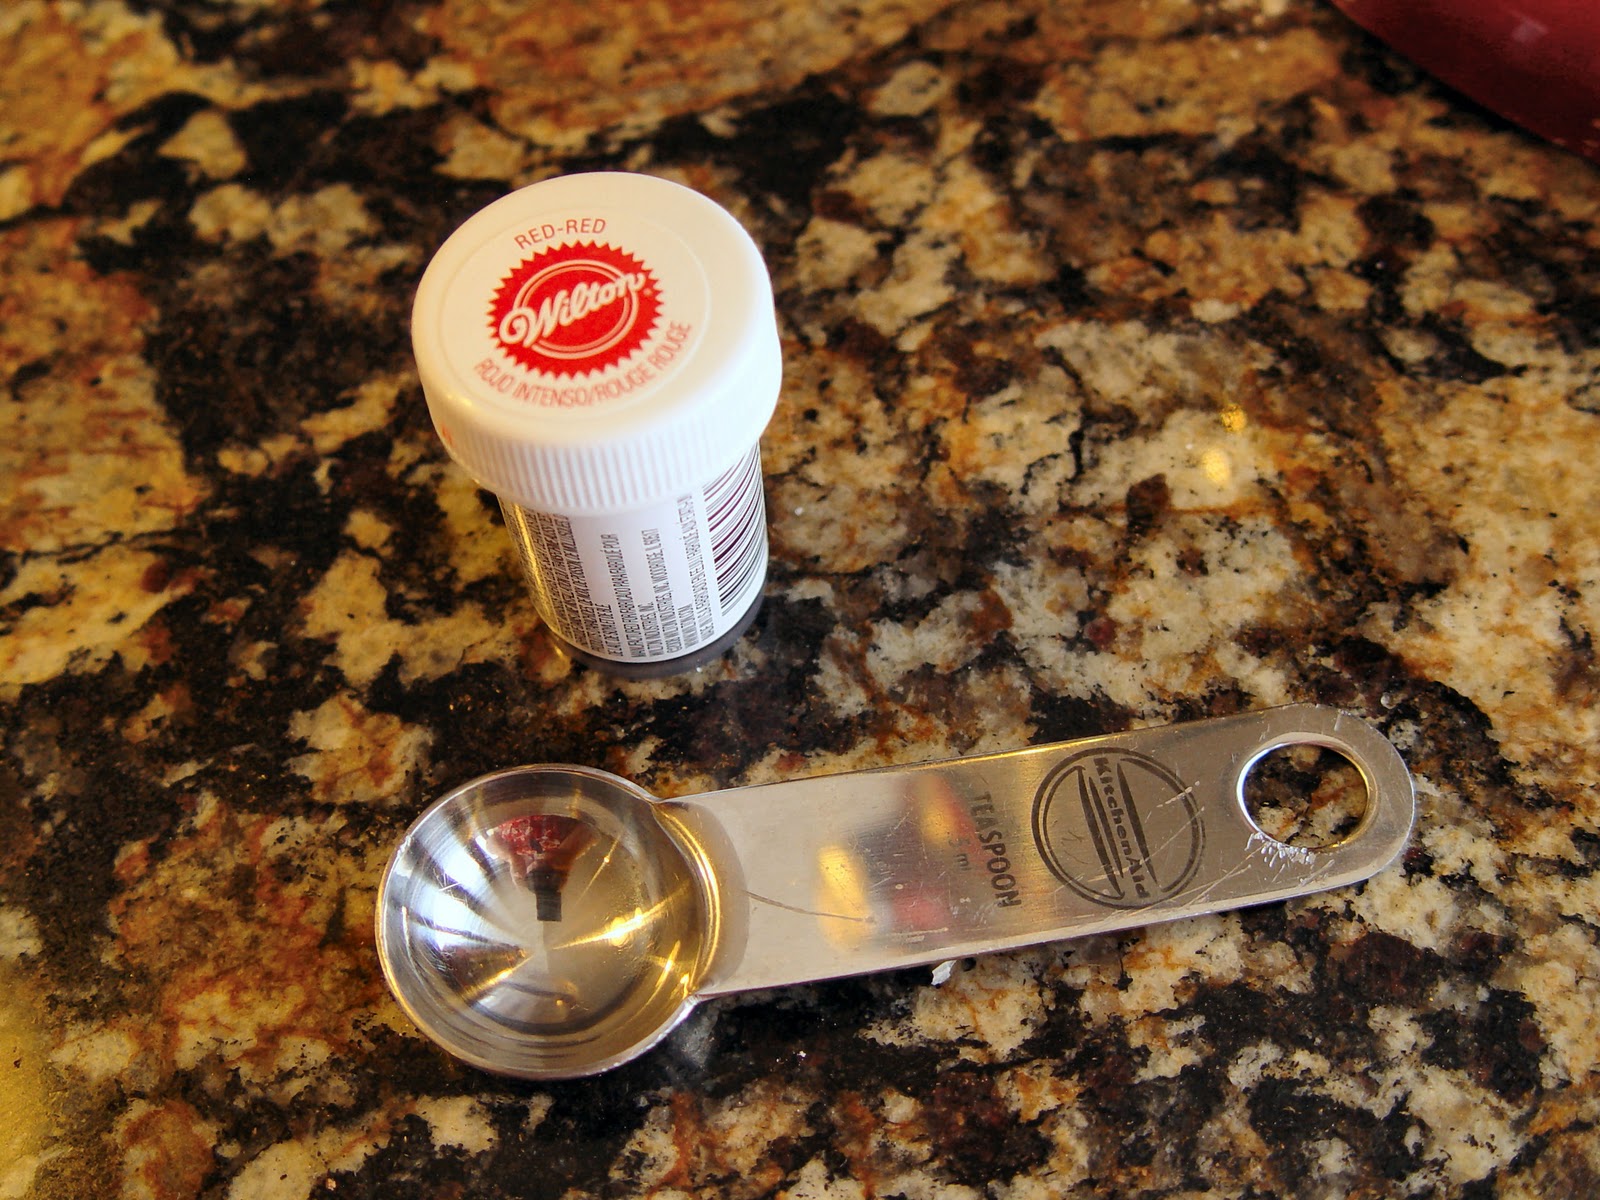
- 1 t red food coloring gel
- 1/2 C semi sweet chocolate chips
- Cream Cheese Layer:
- 1 (8 ounce) package cream cheese, softened
- 1/2 C sugar
- 1 egg
- 1 t vanilla
Instructions
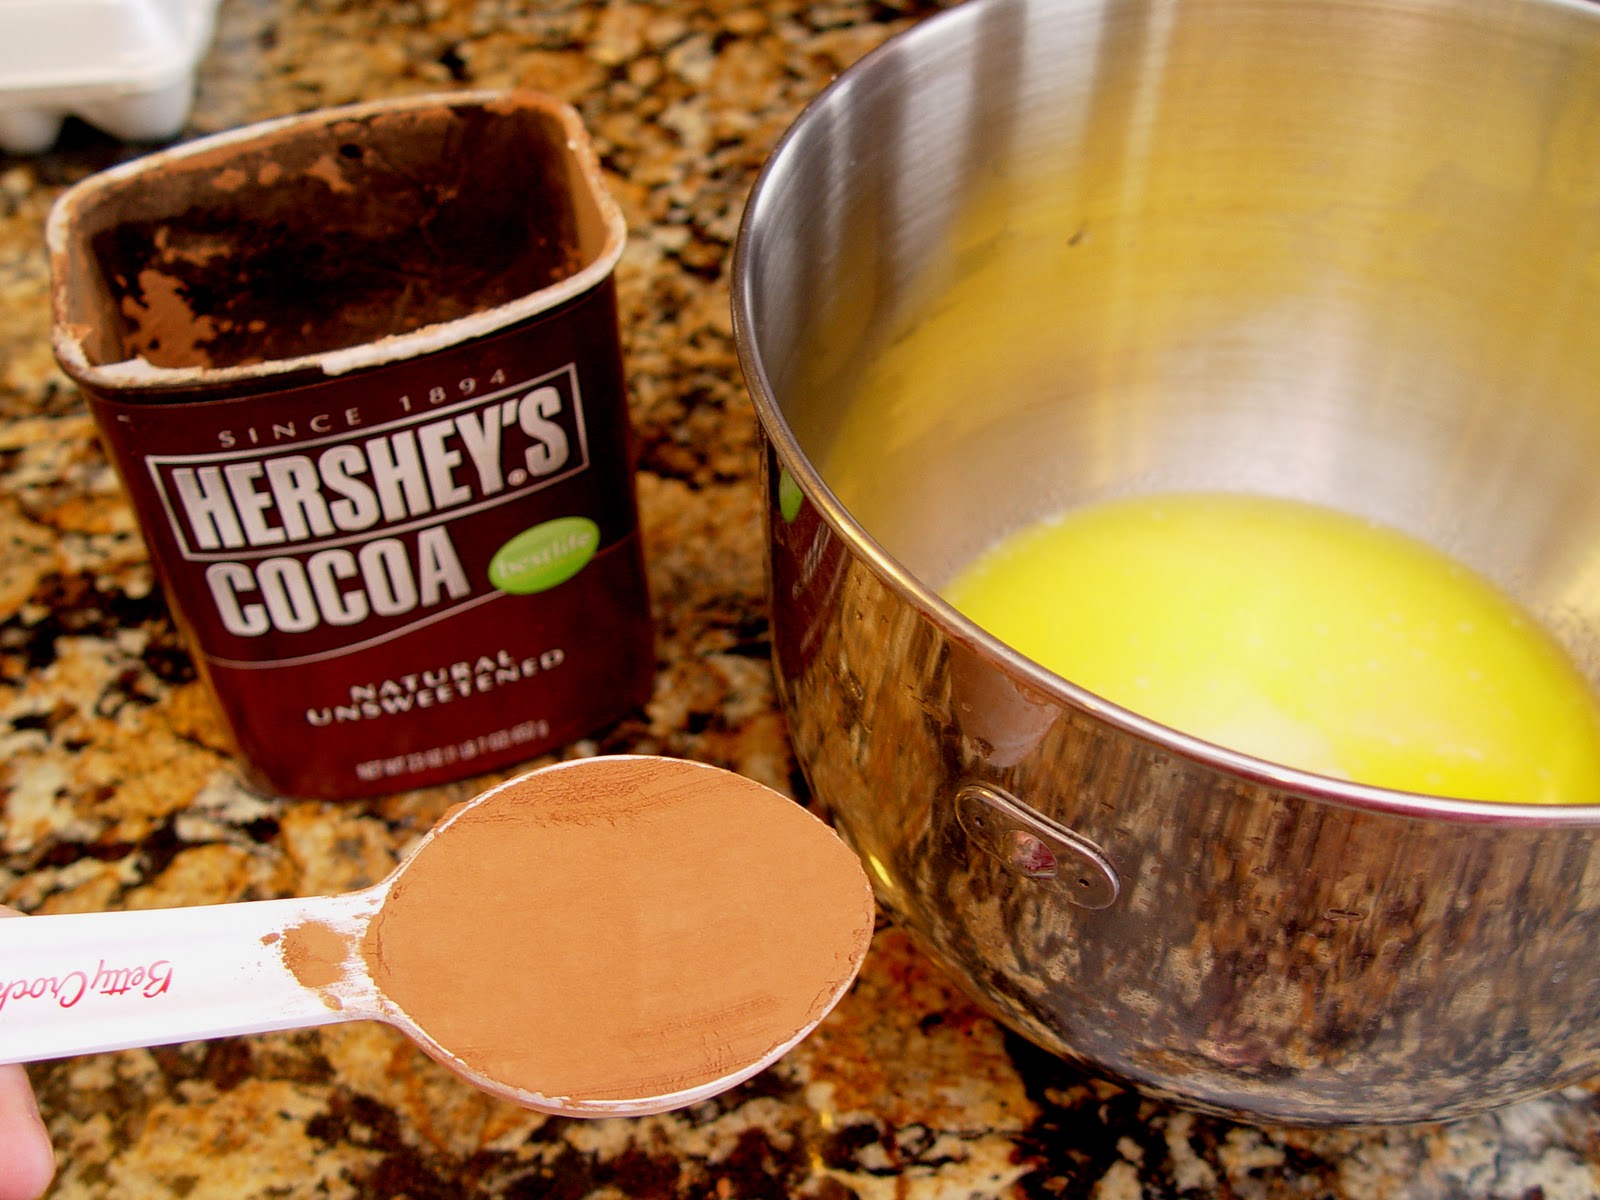
1. Place 1 cup melted butter, 2 cups sugar and 1/3 cup unsweetened cocoa into your stand mixer, or large mixing bowl. Mix it until well combined, about 2 minutes.
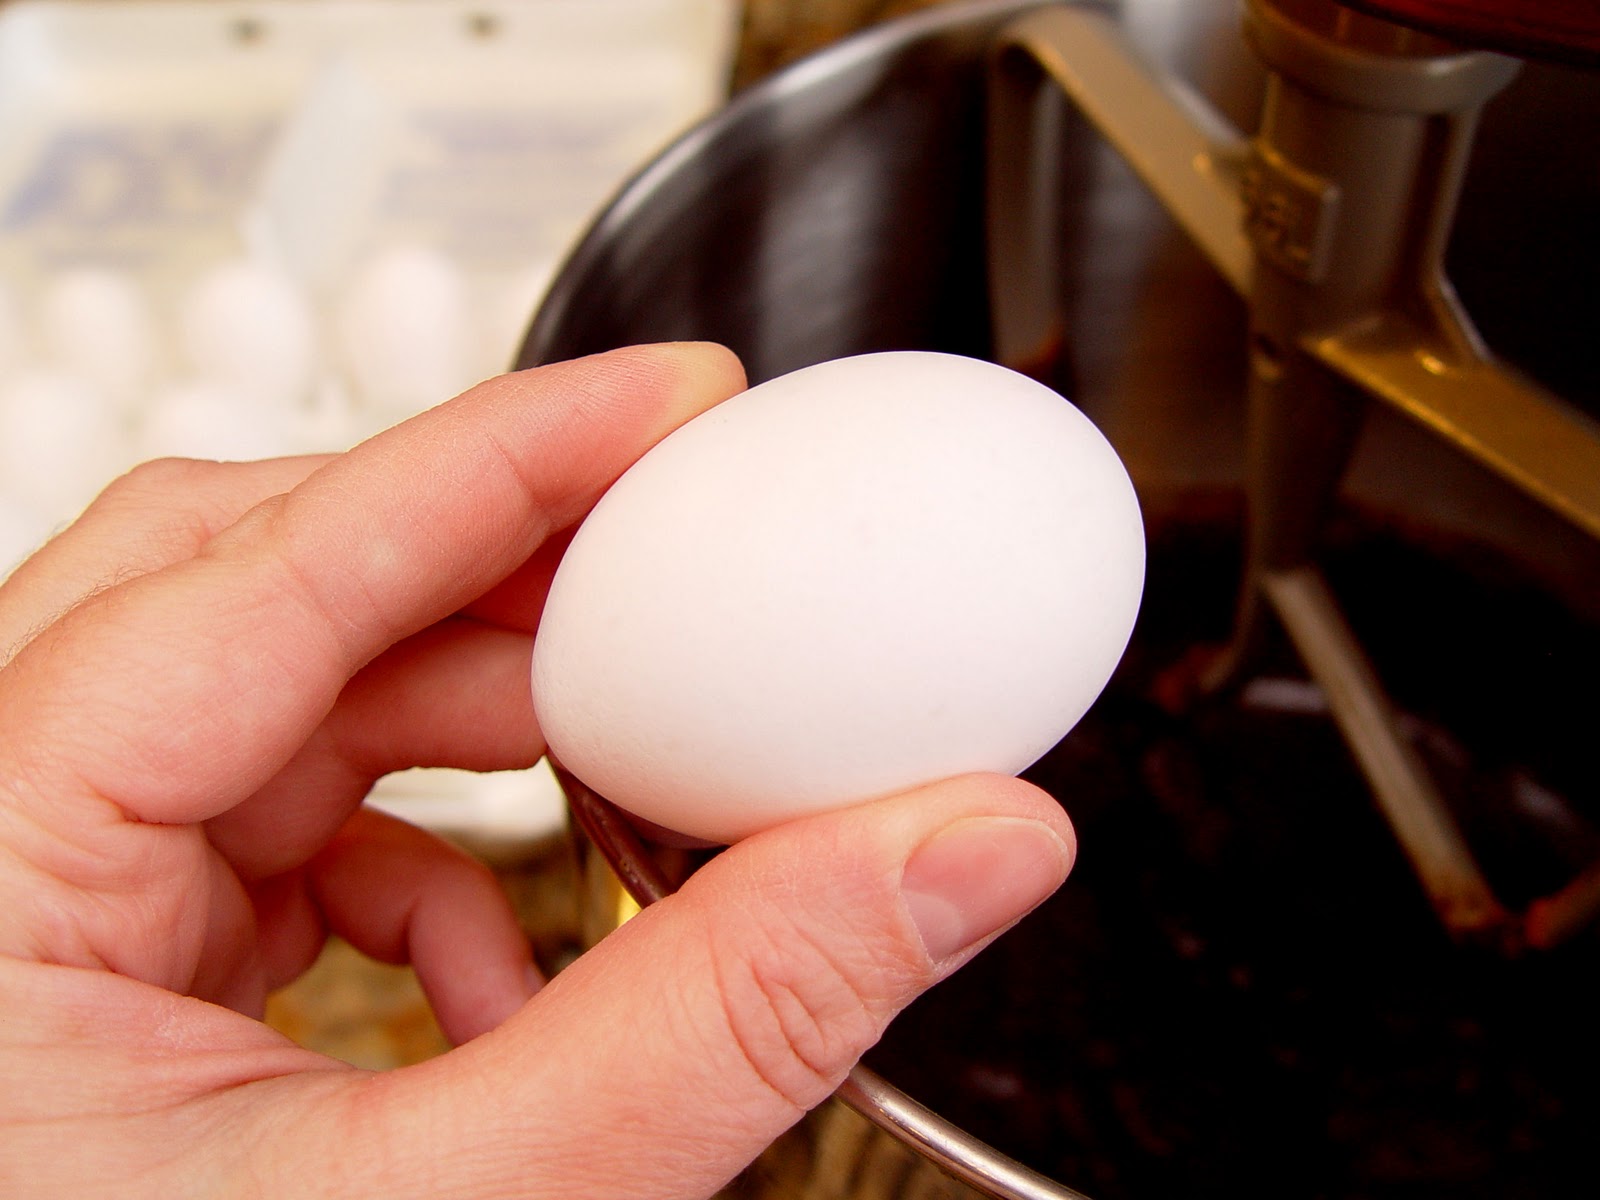
2. Crack one egg and add it to the batter. Mix until the egg is incorporated. Repeat with the three remaining eggs, mixing them into the batter one single solitary egg at a time.
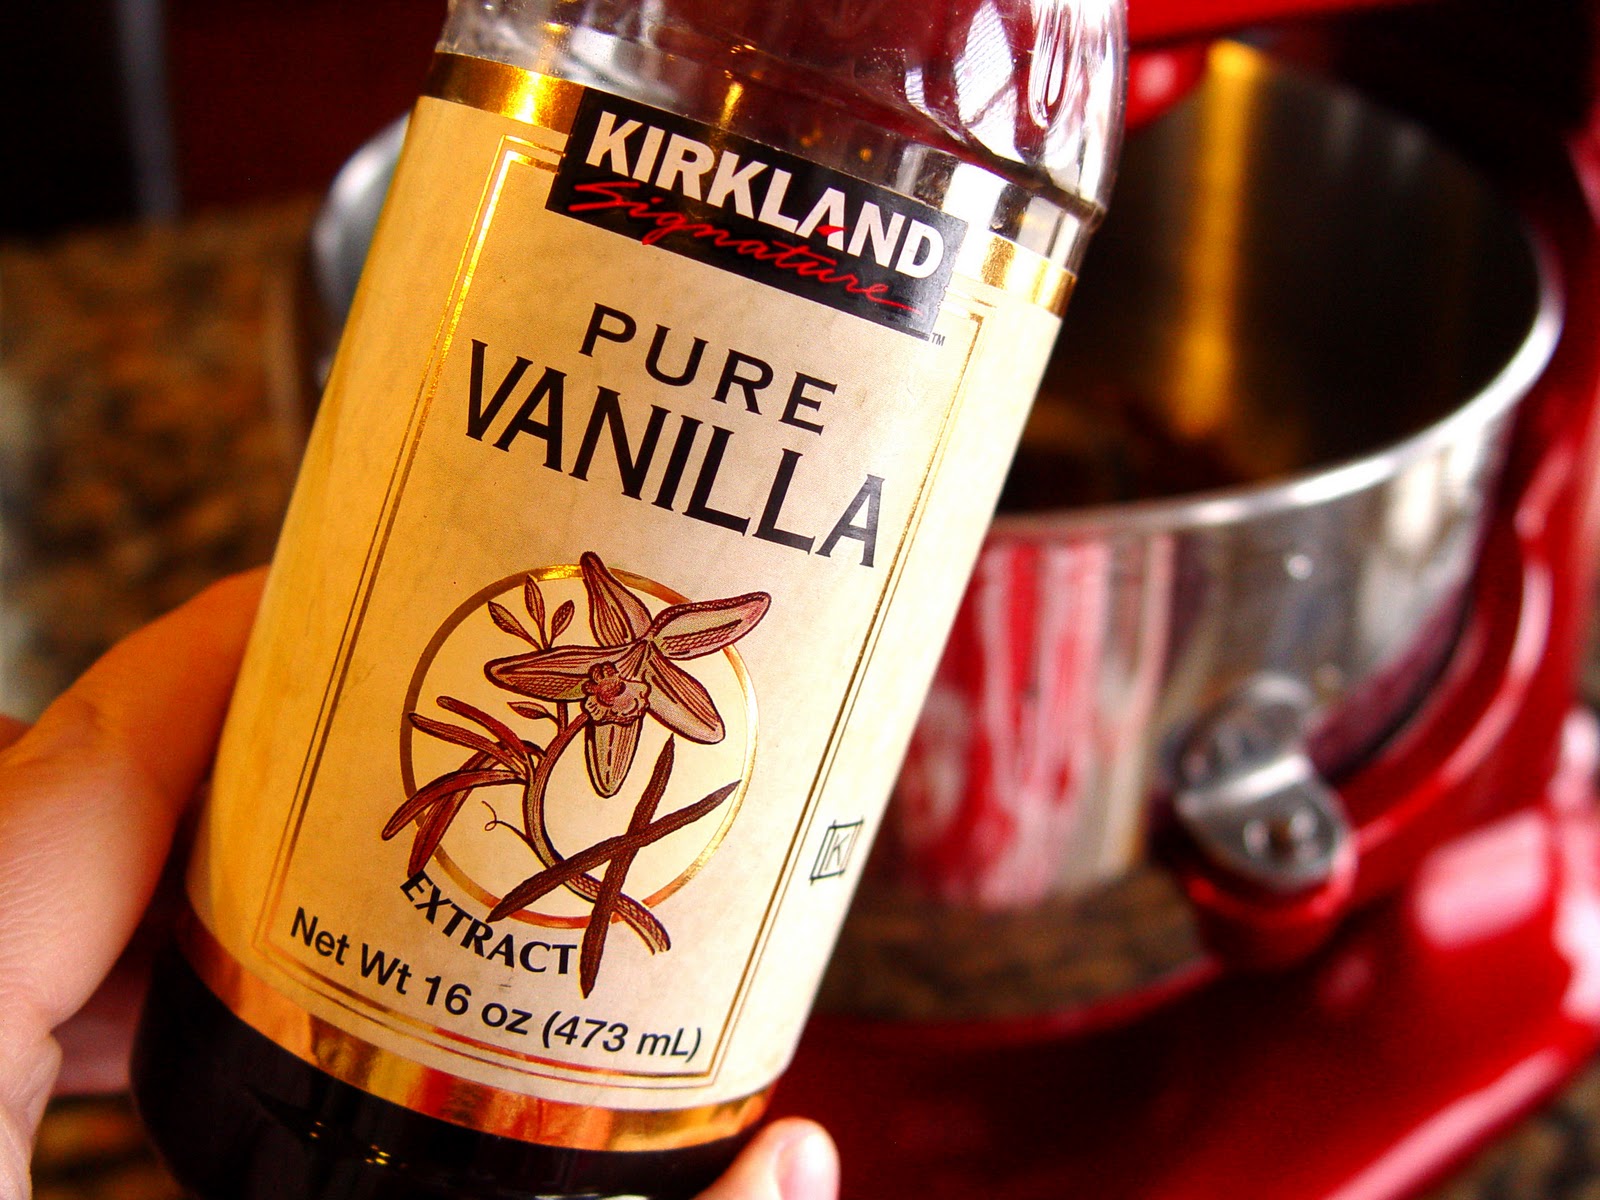
3. Add two teaspoons vanilla to the batter and mix it in.
4. Put 1 1/2 C flour and 1/2 teaspoon salt into a small bowl and fluff it around with a fork to combine the two. Add these dry ingredients to your batter and mix until they are well combined.
5. Add 1 teaspoon red food coloring gel to the batter and mix until the batter in nice and red. This gel can be purchased in the cake decorating section of Walmart or at any craft store. If you only have regular red food coloring, my thoughts are...this recipe would still work, however you may have to add up to 1 Tablespoon of food coloring which may taint the flavor of the brownies a bit.
6. Toss in 1/2 cup semi sweet chocolate chips and mix until combined.
7. Line a 9x13 pan with wax paper, parchment paper or tin foil and spray it with cooking spray. This will help you lift the brownies out of the pan when they have cooled and are ready to cut.
8. Spread the batter out evenly in the pan.
CREAM CHEESE LAYER
1. Place 1 (8 ounce) package softened cream cheese into your stand mixer or medium sized mixing bowl. Beat it until nice and smooth.
2. Add 1/2 C sugar, 1 egg and 1 teaspoon vanilla. Mix until all ingredients are well combined.
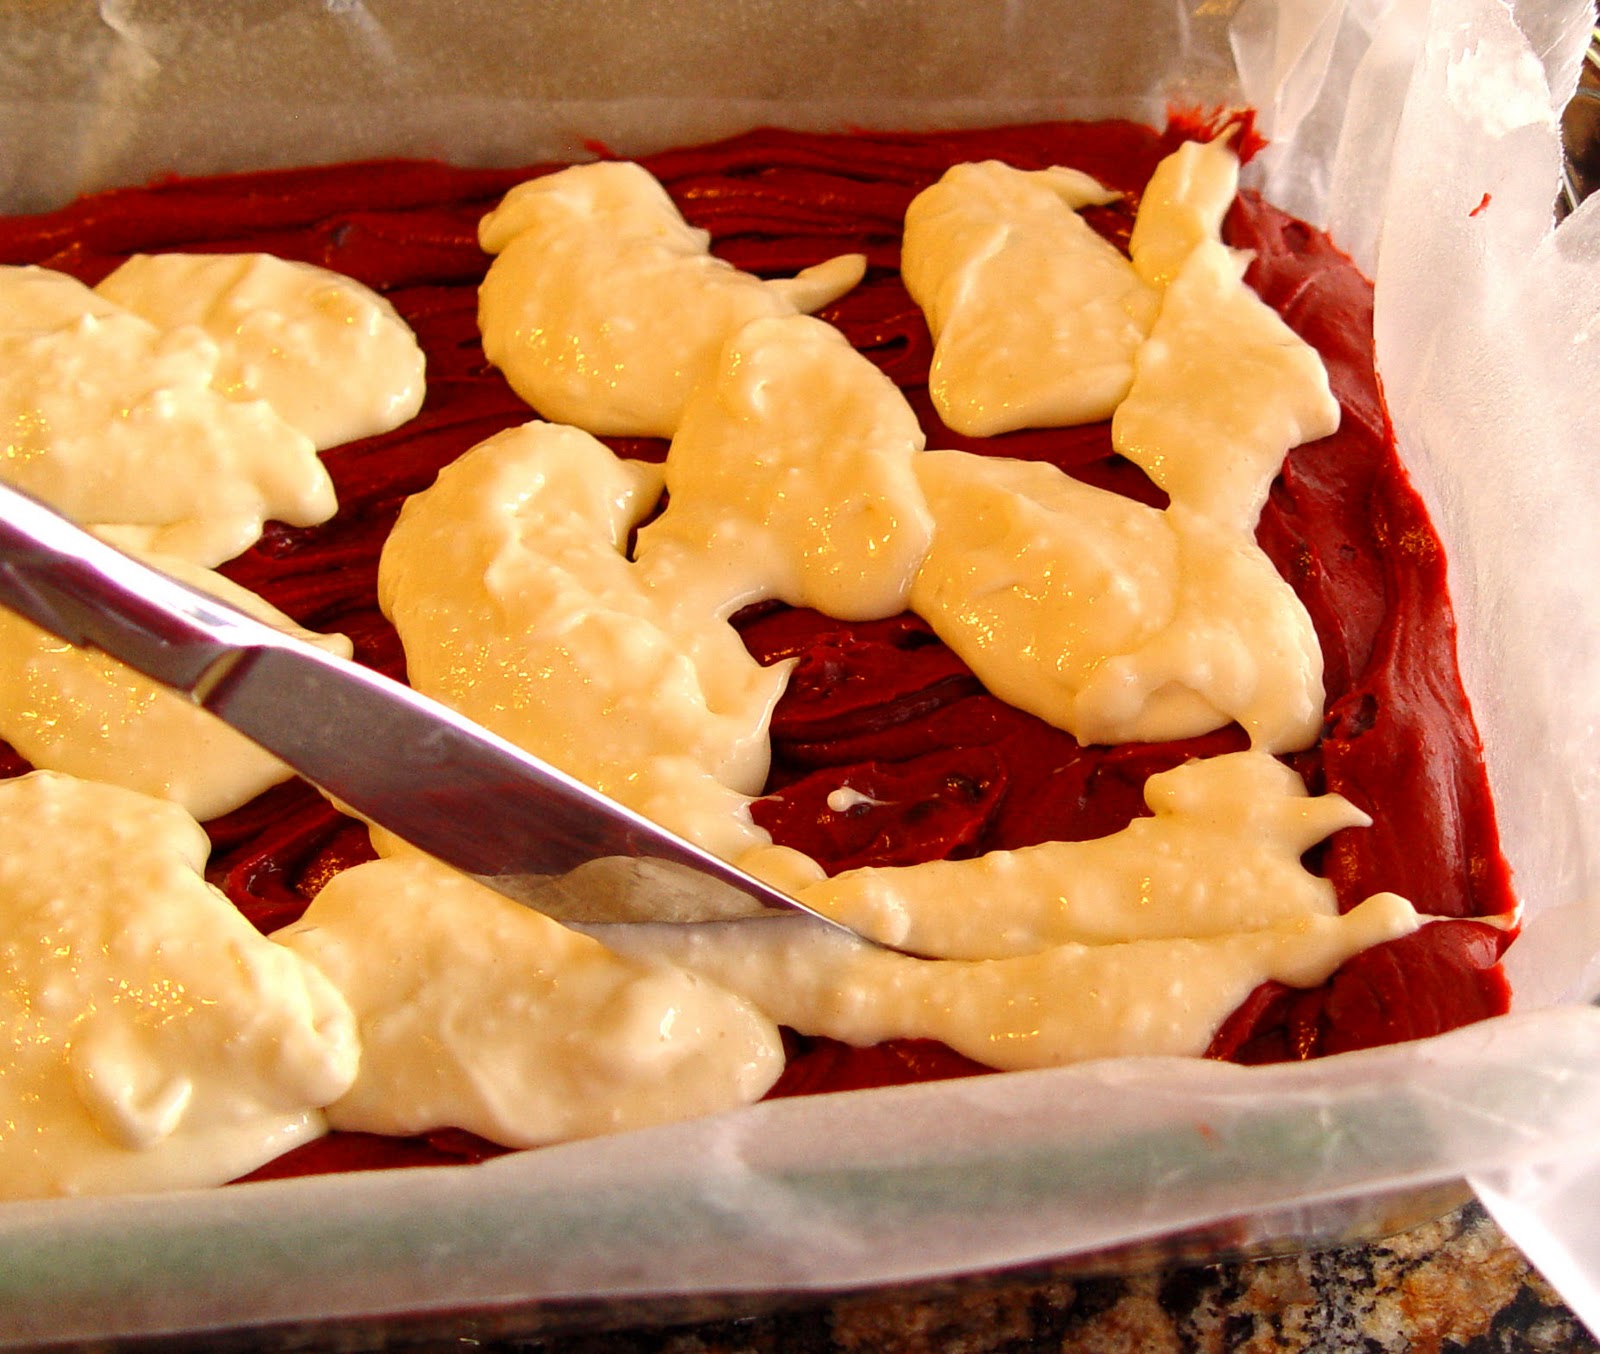
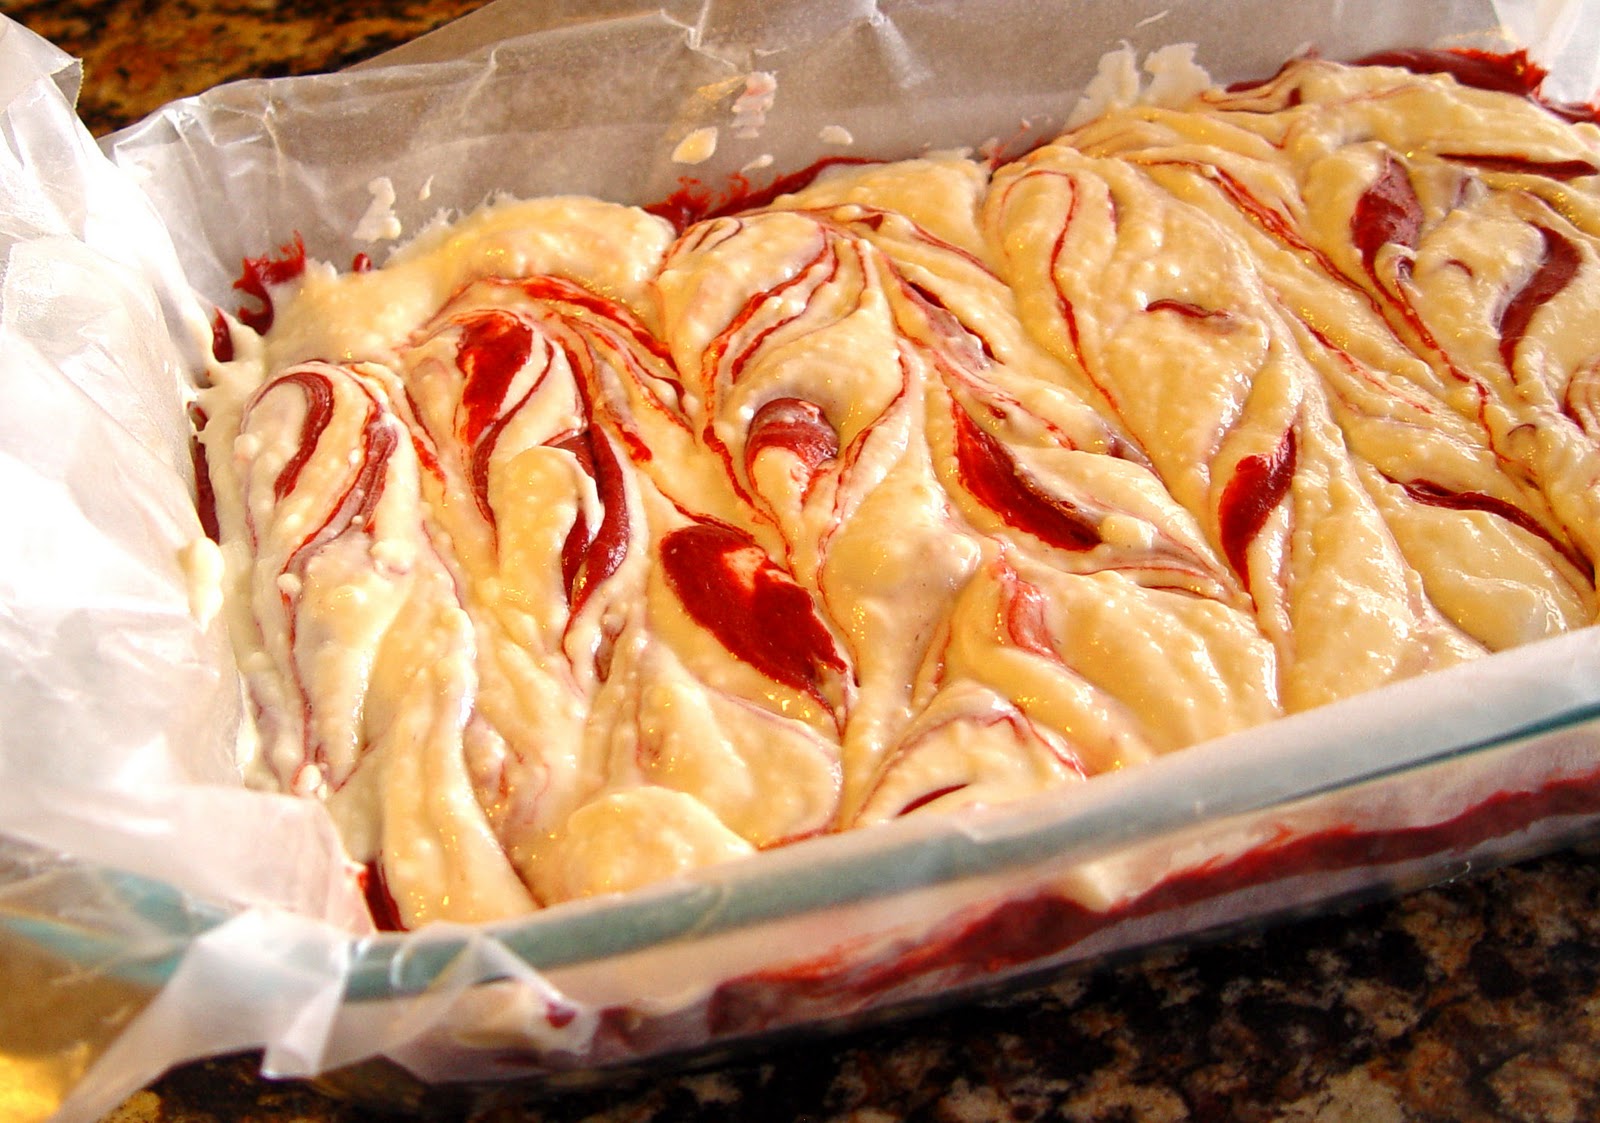
3. Drop the cream cheese mixture onto the beautiful red velvet layer in spoonfulls.
4. Drag a knife through both layers creating a marble effect. You may have to pull a bit of the red layer up onto the white layer to get the look you want.
5. Bake at 350 degrees for 45-55 minutes or until a toothpick inserted into the middle comes out clean. Let the beautiful brownies cool on a wire rack, then lift them out of the pan, cut and serve.
Enjoy!
Recipe from Jamie Cooks It Up!
do you use self rising or all purpose flour
Hi Anonymous,
I always us all purpose flour. Good luck! Hope you love them!
~Jamie
My cream cheese mixture was very runny. Any thoughts?
Hi KG,
That has happened to me in the past as well. Sometimes if your cream cheese is SUPER soft, it can make the batter runny. Also, if you use a store brand, or if you add all of the cream cheese layer ingredients together at a time rather than beating the cream cheese first…you can end up with runny batter. That said…did they still turn out good?
~Jamie
Just looking for free prlbiante coloring pages of Bible stories for kids. We are missionaries in Cambodia and would love to see what you have. How do I access these? Thanks for any help you can give!
It wasn't store brand. It may have been too soft or maybe I shouldn't have beat it as long as I did. They taste good, but don't look nearly as nice as yours! They actually got a little brown on top. I have a convection oven & I even knocked 15 degrees off and only baked for 45 min. I'll have to watch them a little closer next time! Thanks! Love your recipes!
I went to Michael's to get the food coloring and they handed me the frosting coloring. Is this what you use? Don't want to waste all the $$ using the wrong stuff.
Hey MommaMary,
If it's gel, or a paste it should work just fine.
Good luck
~Jamie
When you hit the Film Festival circuit, can you make sure you ildunce the New Zealand International Film Festival?! I have been pestering them (in a charming manner of course) for sometime now. Bill Cunningham and The Eye Will Travel have had great audiences here, as I am sure Advanced Style would also.
I just went to get the food coloring gel, the only thing my grocery store had was pink gel, and A red decorating gel that was in a tube. I'm not sure what decorating gel is but it was a very small tube of it, do you think this will work? I have liquid red food coloring but I know it may affect the flavor like you said.
I have seen many recipes online that use regular red food coloring, I think you will be ok to use it. However the red decorating gel in the tube should work out as well. Did you notice what brand it was? Might it have been “Americolor”? That is a great brand, as well as the Wilton brand you see in the picture above. You can purchase Wilton at Walmart, and most craft stores. Good luck!
~Jamie
I made them and they turned out great!! Everyone loved them! I did some research and decorating gel isn't the same as gel food coloring so I ended up buying the pink food coloring gel and added the whole bottle to make it red. They were delicious!!! Thanks for another great recipe!
So glad to hear it Danielle! Thanks for letting me know and have a great Valentines Day!
~Jamie
I am so disappointed! I followed the recipe word for word and ended up with cake instead of brownies. I called my daughter to see how hers turned out, we were both making them to give to friends for Valentine's Day, and she said the same thing happened to her. Why did this happen to us. We are both experienced bakers.
Hi Jan,
Wow, I'm so sorry they didn't turn out as you were expecting them to. Can you give me a little bit more information about how they tasted and looked? That may help me determine what went wrong.
Thanks,
~Jamie
Hi, I went strictly by the recipe and even cut down on the baking time and mine turned out more like a cake than brownies. They still taste good but I love the texture of the ones in your picture. Should I maybe cut back on flour or even less cooking time?I do a lot of baking and really want to master this recipe.
Hey there,
You are not the first to ask this question.:)I would imagine that a little bit less flour (be careful)might do the trick, as well as baking them less. Good luck. I'm planning on making them again soon, to see if I can get them to turn out a second time like the pictures and to be sure all instructions are clear.
Thanks,
~Jamie
I love your work, and this paintover adds a new dminesion to the original. The only thing that bothers me a bit is the hair…as you tried to keep the original drawing, those dark lines add too much contrast compared with the “clean” face (lovely!!!).In any case, superb…
These look sooo good! I am so excited to make them they don't look too hard either! (that's a plus for me) 🙂
These look delicious and was so excited I finally got a chance to make them! I have one question, I forgot to add 1/2 cup of chocolate chips and didn’t realize until I was adding the cream cheese mixture. Has this ever happened to you before? Is leaving them out going to make a big difference in the taste?