This post may contain affiliate links. Please read our disclosure policy.
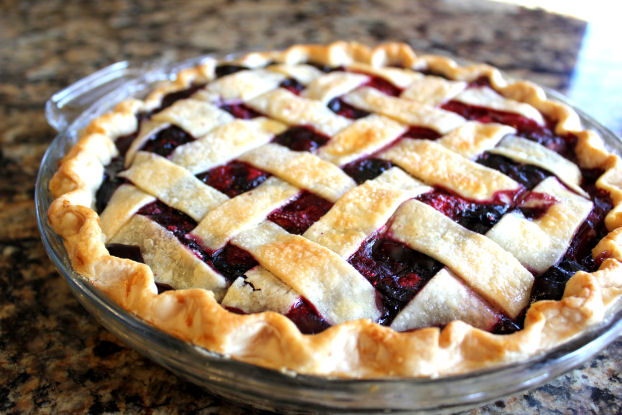
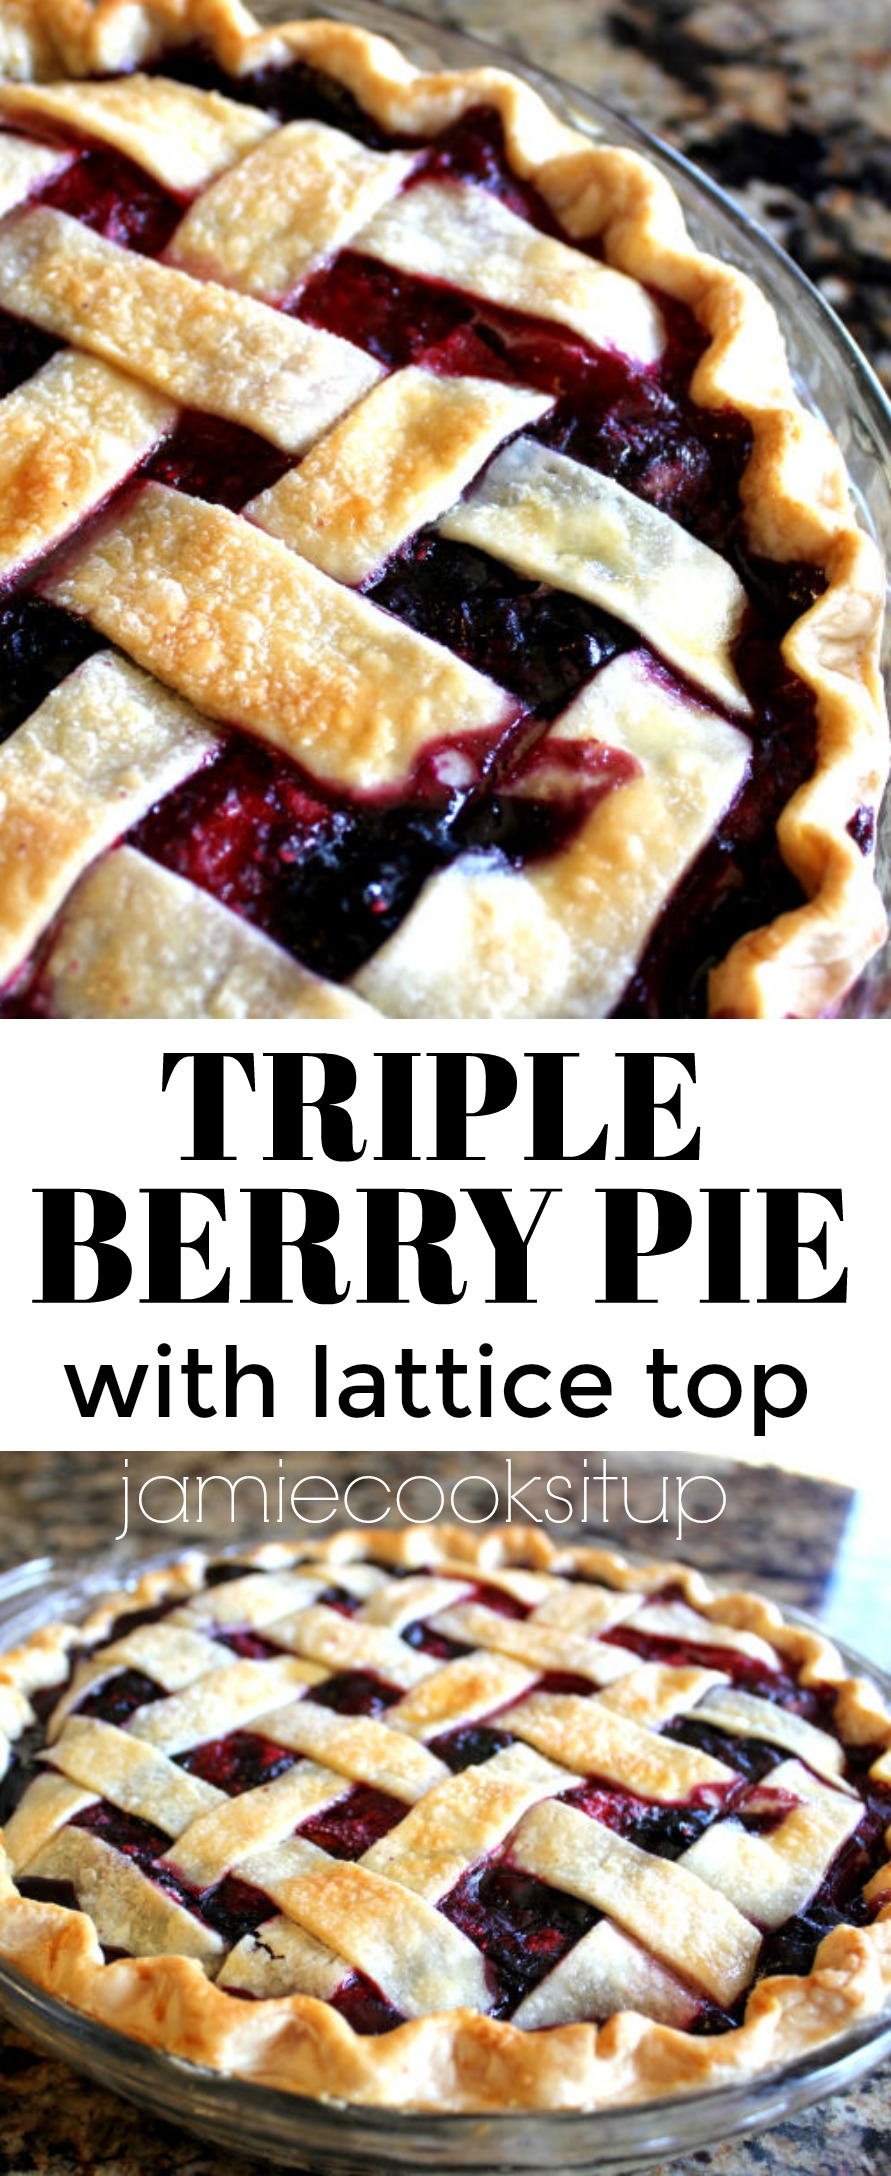
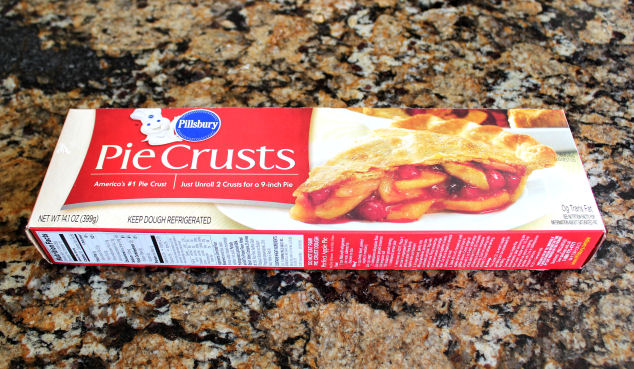
For quite some time now, I have wanted to learn to make a lattice topped pie. They are just so pretty and inviting! With Thanksgiving on the horizon I figured it was a good time to learn. I love the taste of a triple berry pie…so I researched several recipes, studied the art of lattice pie making, made a few pies and have settled on this wonderful recipe to share with you. I am also including a step by step tutorial on how to make the lattice top become a reality. Now, don’t get all panicky and fearful of this recipe. It is a lot easier than it looks! You can totally make this pie…and it won’t even take you all day! You will notice that I used a premade crust (that means I bought the pie dough from the refrigerated section of my local grocery store) and it turned out wonderfully! While testing out the recipe I made a second pie with a homemade crust (recipe HERE), and it was really tasty as well…but my family actually preferred the premade crust. Go figure. 🙂
Let’s make some pie, man!
1. Preheat your oven to 375 degrees.
2. Make your pie crust, or pull your pie crust out of the fridge. Which ever you prefer. Feel no shame if you are using a premade crust. 🙂
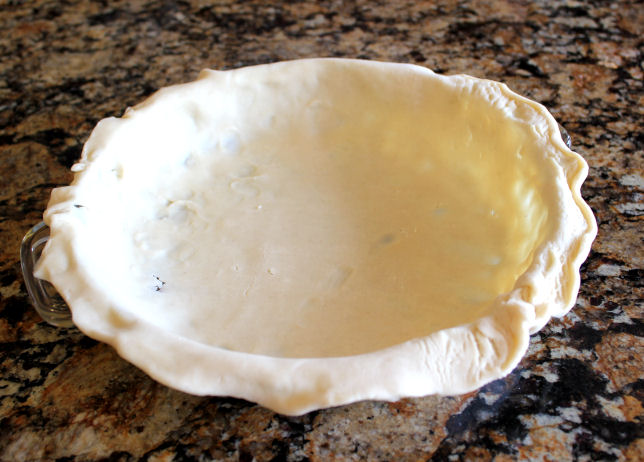
3. Grab a (9 inch) deep dish pie plate and carefully lay the crust into it. You’ll want to be sure there is about 1/2 inch of the crust hanging over the side of the plate. Give it a gently stretch if you need to.

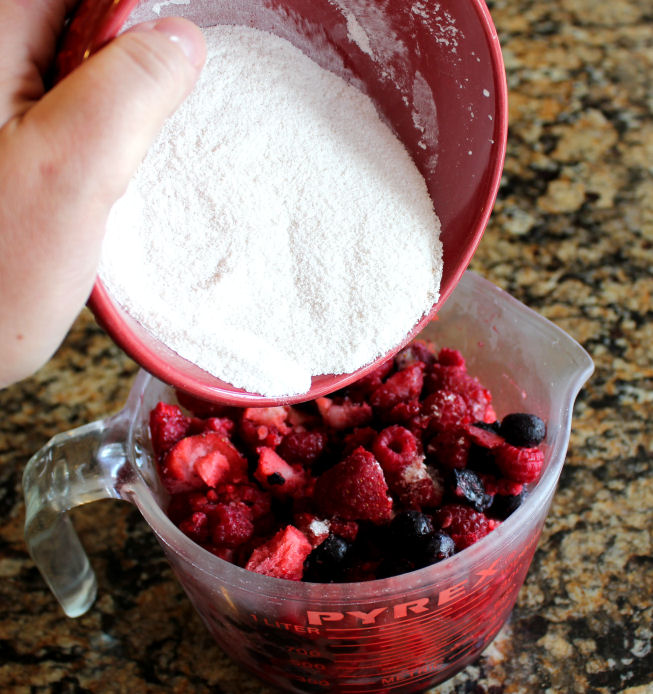
4. Into a small bowl place 2/3 cup sugar and 1/4 cup cornstarch. Stir it to combine.
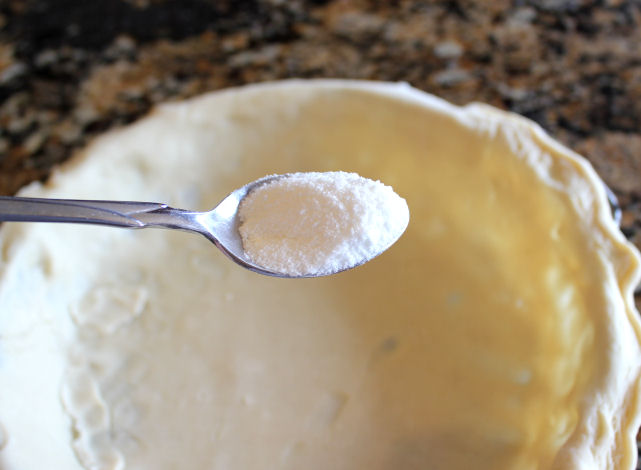
5. Sprinkle about 1 teaspoon of the sugar mixture into the bottom of the pie crust…
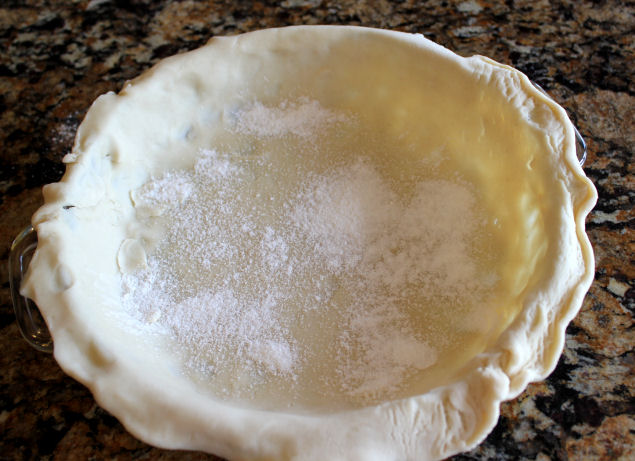
like this. 🙂 The sugar/cornstarch will help the crust avoid becoming soggy.
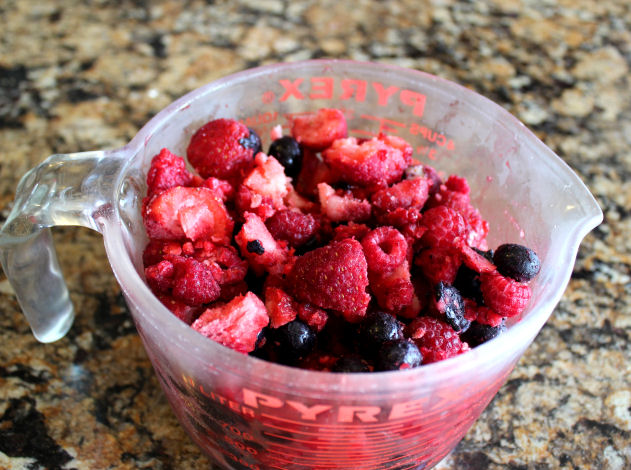
6. Grab your berries. I opted to cut a few of the strawberries in thirds so that the berries would be more uniform in size. I also let mine sit out for about 30 minutes, and this seemed to work well. They were still cold, butnot mushy at all. I didn’t drain any of the juice from the berries.
7. Add 1/4 teaspoon of cinnamon to the sugar mixture. Stir it around to combine then add it to the berries, stirring gently to combine.
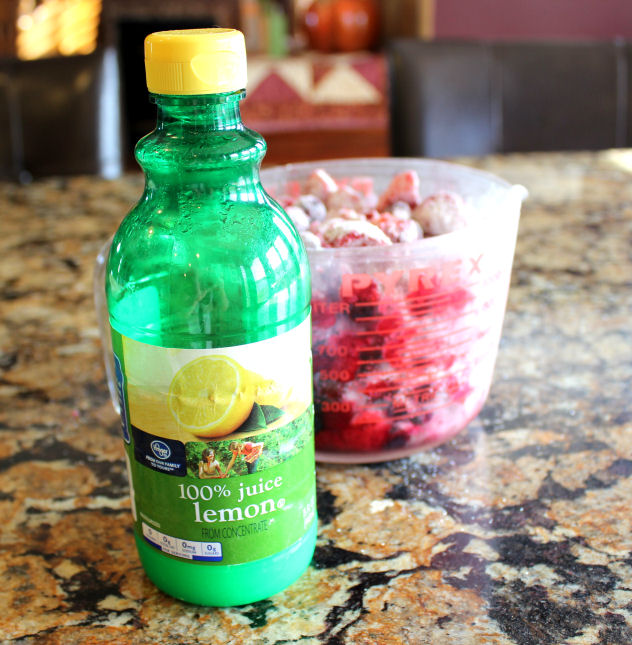
8. Add 1 tablespoon lemon juice to the berries and stir to combine.
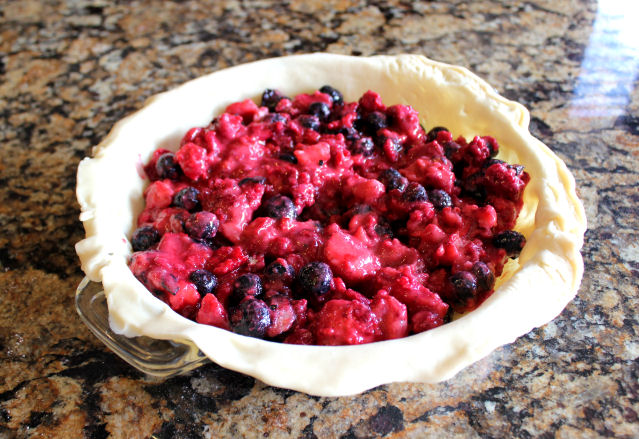
9. Pour the beautiful berry mixture into the pastry shell.
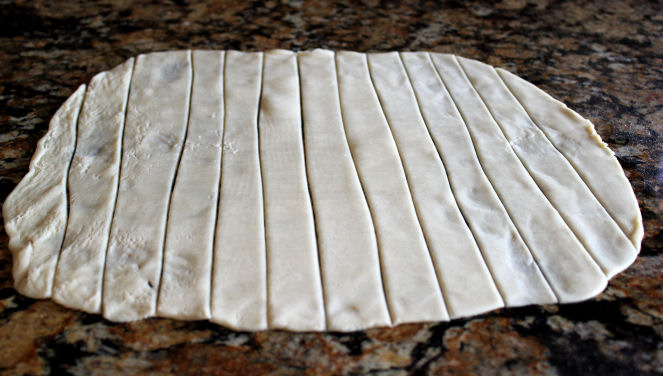
10. Take the remaining pastry crust and gently stretch it out just a bit. Cut it into 10-12 strips (about 1 inch wide) with a pizza cutter.
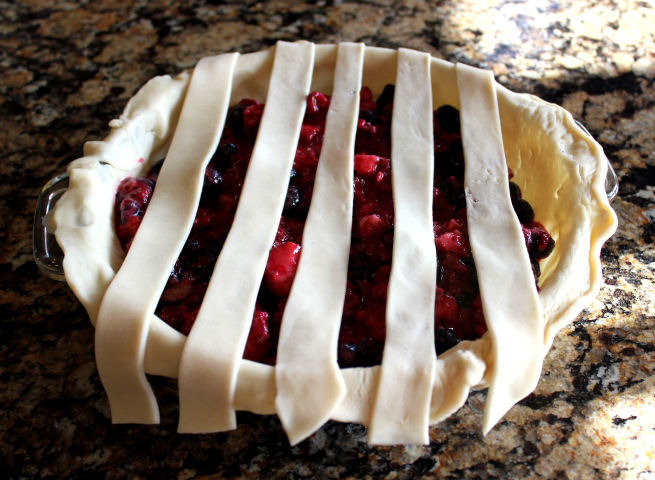
11. Carefully drape 5 strips over the top of the pie filling, making sure you have a nice space between each strip.
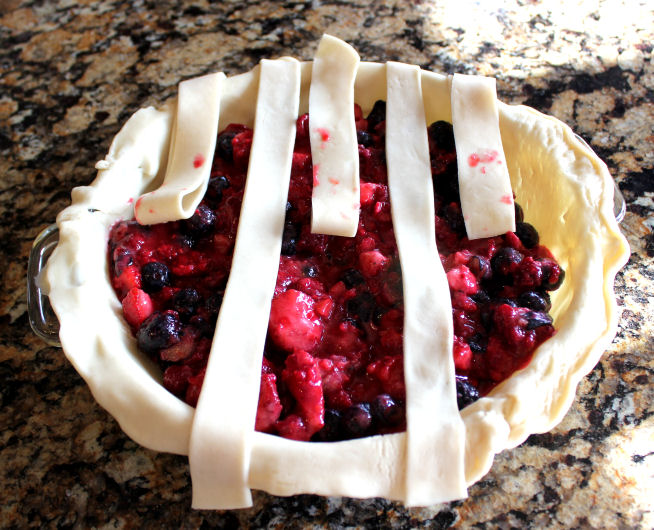
12. Carefully pull the 1st, 3rd and 5th strip halfway back.
Lay another strip over the top of the 2nd and 4th strip…
then lay the 1st, 3rd and 5th strip back down.

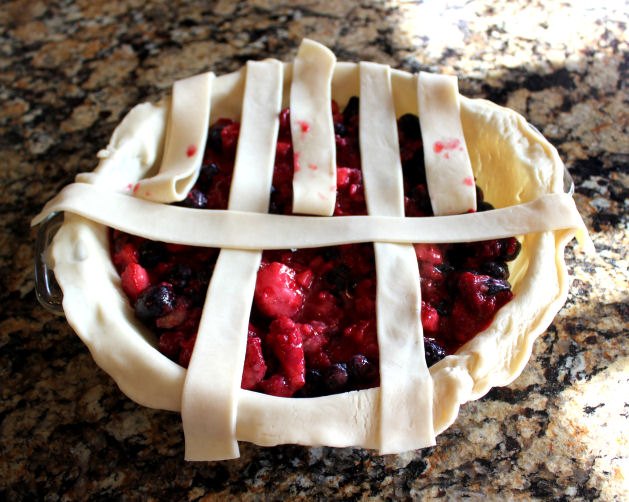
Pull the 2nd and 4th strip back and lay another strip over the top of the 1st, 3rd and 5th strip.
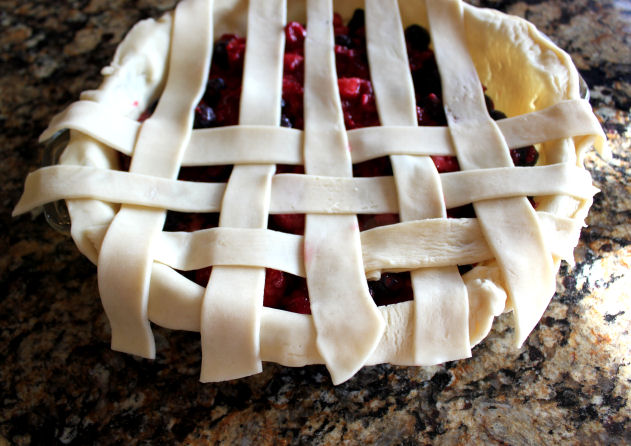
Continue on with the remaining strips.
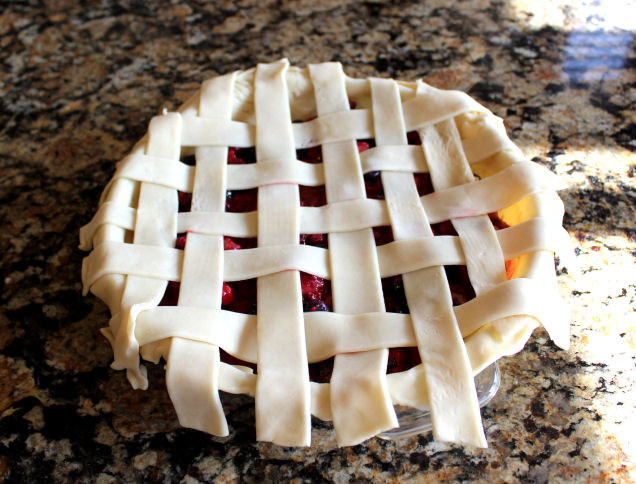
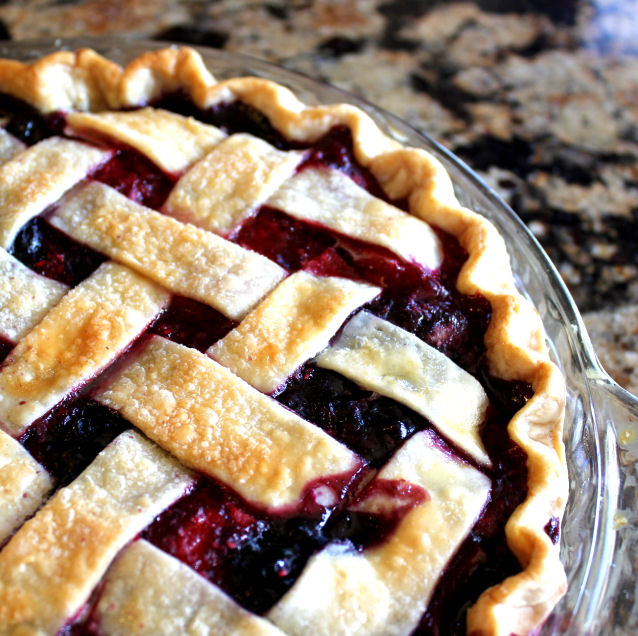
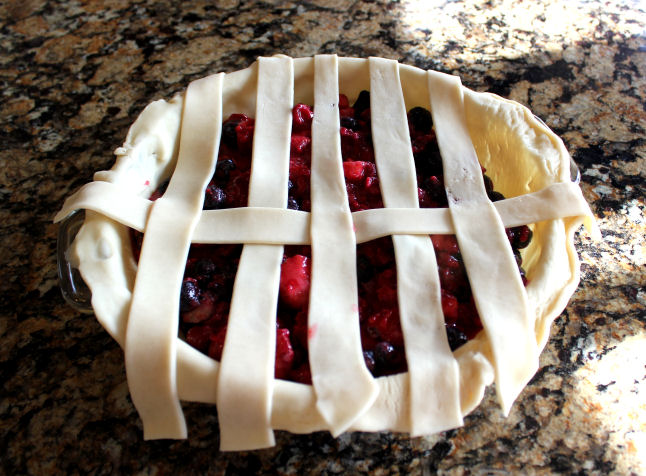
Until you have woven yourself a lovely lattice top.
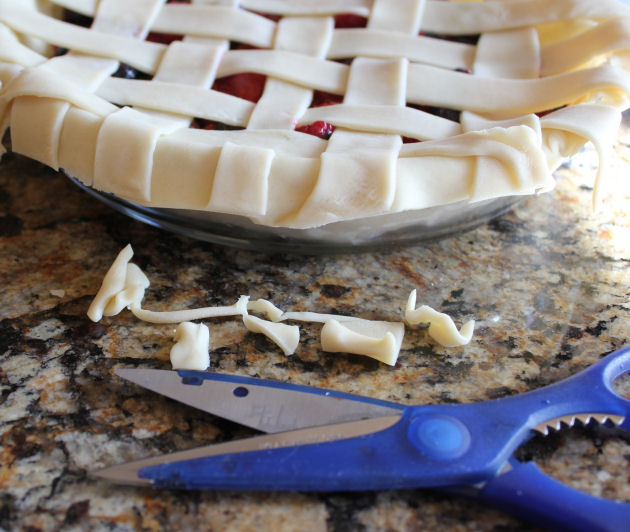
13. Take a pair of kitchen scissors and trim the edges of the pie so they lay evenly.
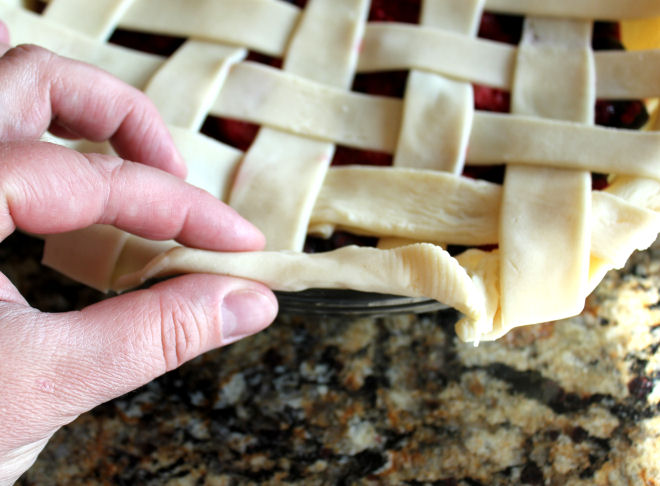
14. Bring the side of the crust up and over and pinch the strips and the bottom crust together.

15. Make the edge of the crust pretty by pinching the dough between two fingers and pressing another finger where the arrow is. Does that make a whole lot of sense or what! If I could have taken a picture of both my hands at the same time, boy I would have. Couldn’t figure out how to hold the camera and pinch the dough at the same time. You understand, right. 🙂
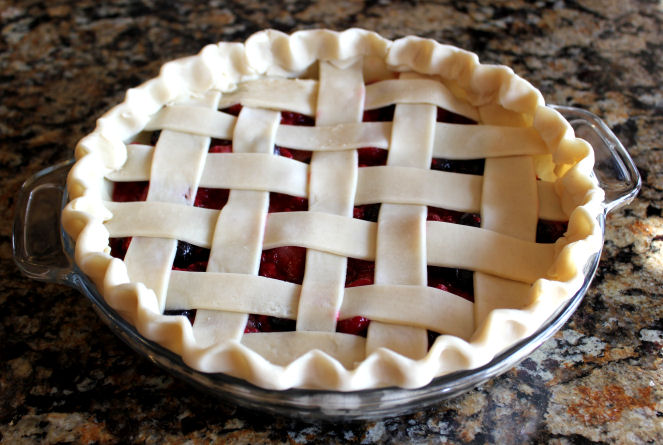
This is what we are after. Woo Hoo! Pretty as a picture.
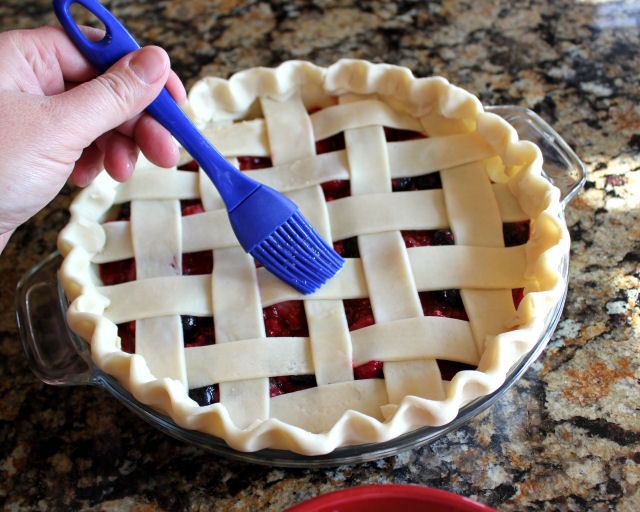
16. Whisk 1 egg with 1/4 cup cold water and brush it over the top of the crust.
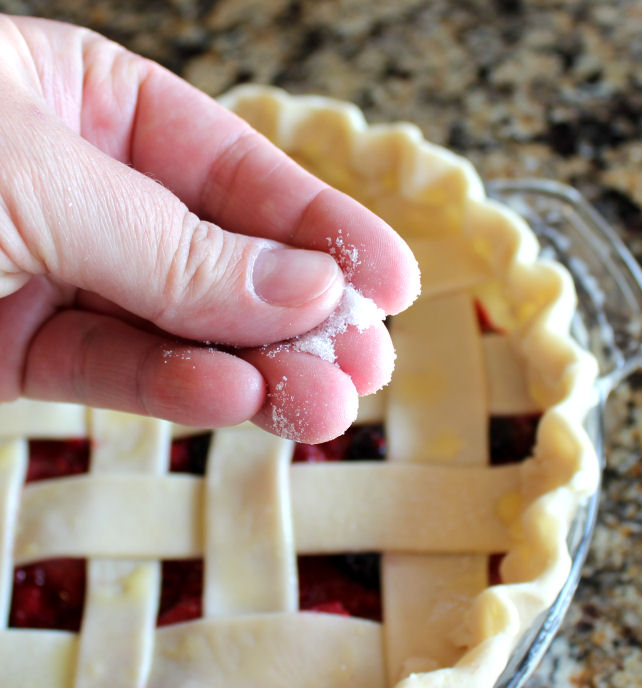
17. Sprinkle about 1 tablespoon of sugar over the top of the crust.
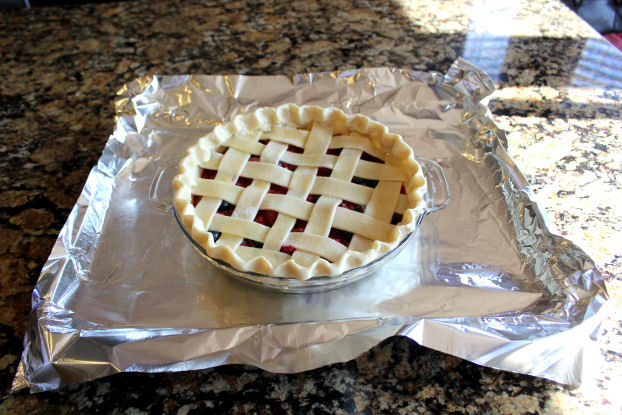
18. Line a large cookie sheet with tin foil and place the pie in the center.
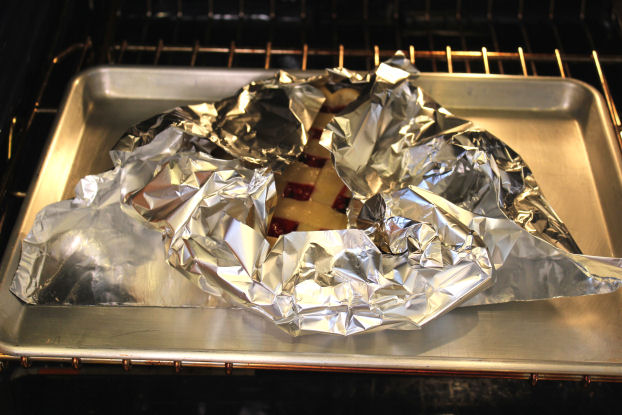
Wrap the foil around the crust, pop it in the oven and bake for 20 minutes. Unwrap the foil from the pie and bake for an additional 20-30 minutes or until the pie is golden and the center is bubbly and thick.
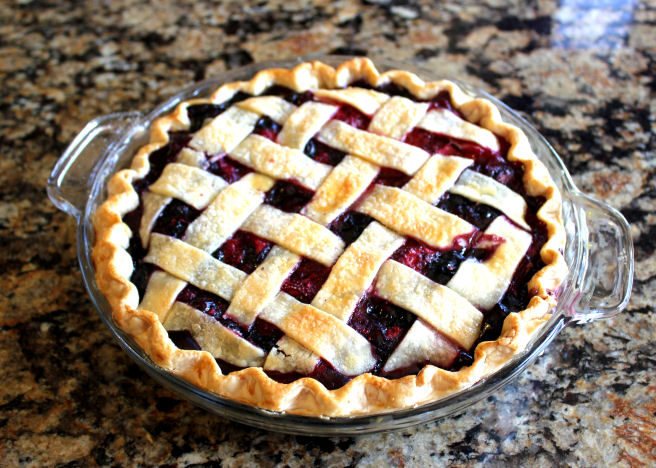
Allow the pie to cool for a few minutes before you dig in. If you let it sit and cool completely, the filling will set up nicely for you. If you eat it warm, the filling will be just a bit runny, which isn’t a bad thing. Just be aware that as it sits it will thicken up.
Enjoy!
Ingredients
- 2 pie crusts (not baked) Recipe found HERE or purchase them premade
- 4 C frozen berries, thawed at room temperature for 30 minutes (I used a blend of strawberries, blueberries and raspberries)
- 2/3 C sugar
- 1/4 C cornstarch
- 1/4 tsp cinnamon
- dash salt
- 1 Tb lemon juice (bottled is fine)
- 1 egg
- 1/4 C cold water
- 1 T sugar
Instructions
1. Preheat your oven to 375 degrees.
2. Make your pie crust, or pull your pie crust out of the fridge. Which ever you prefer. Feel no shame if you are using a premade crust.
3. Grab a (9 inch) deep dish pie plate and carefully lay the crust into it. You'll want to be sure there is about 1/2 inch of the crust hanging over the side of the plate. Give it a gently stretch if you need to.
4. Into a small bowl place 2/3 cup sugar and 1/4 cup cornstarch. Stir it to combine.
5. Sprinkle about 1 teaspoon of the sugar mixture into the bottom of the pie crust. The sugar/cornstarch will help the crust avoid becoming soggy.
6. Grab your berries. I opted to cut a few of the strawberries in thirds so that the berries would be more uniform in size. I also let mine sit out for about 30 minutes, and this seemed to work well. They were still cold, but not mushy at all. I didn't drain any of the juice from the berries.
7. Add 1/4 teaspoon of cinnamon to the sugar mixture. Stir it around to combine then add it to the berries, stirring gently to combine.
8. Add 1 tablespoon lemon juice to the berries and stir to combine.
9. Pour the beautiful berry mixture into the pastry shell.
10. Take the remaining pastry crust and gently stretch it out just a bit. Cut it into 10-12 strips (about 1 inch wide) with a pizza cutter.
11. Carefully drape 5 strips over the top of the pie filling, making sure you have a nice space between each strip.
12. Carefully pull the 1st, 3rd and 5th strip halfway back. Lay another strip over the top of the 2nd and 4th strip then lay the 1st, 3rd and 5th strip back down. Pull the 2nd and 4th strip back and lay another strip over the top of the 1st, 3rd and 5th strip. Continue on with the remaining strips. Until you have woven yourself a lovely lattice top.
13. Take a pair of kitchen scissors and trim the edges of the pie so they lay evenly.
14. Bring the side of the crust up and over and pinch the strips and the bottom crust together.
15. Make the edge of the crust pretty by pinching the dough between two fingers and pressing another finger where the arrow is. Does that make a whole lot of sense or what! If I could have taken a picture of both my hands at the same time, boy I would have. Couldn't figure out how to hold the camera and pinch the dough at the same time.
16. Whisk 1 egg with 1/4 cup cold water and brush it over the top of the crust.
17. Sprinkle about 1 tablespoon of sugar over the top of the crust.
18. Line a large cookie sheet with tin foil and place the pie in the center. Wrap the foil around the crust, pop it in the oven and bake for 20 minutes. Unwrap the foil from the pie and bake for an additional 20-30 minutes or until the pie is golden and the center is bubbly and thick. Allow the pie to cool for a few minutes before you dig in. If you let it sit and cool completely, the filling will set up nicely for you. If you eat it warm, the filling will be just a bit runny, which isn't a bad thing. Just be aware that as it sits it will thicken up.
Enjoy!


Can you make the night before? If so, what should the warming instructions be?
I made this today with a mix of fresh raspberries & frozen blueberries. The pie is delicious! But, I definitely learned a few things. I should’ve used another cup of berries and I probably should’ve cooked 15 minutes more or uped the temperature on the oven because the pie was very soupy even after setting for over an hour. I also topped the pie with pearl sugar, which made it beautiful, and I used a good 2 to 3 tablespoons..
Your directions were so easy to follow. Can’t wait to have a slice.
The link to print this isn’t working.
Stacey,
Thank you for letting me know. I have fixed the issue.
Best,
~Jamie